
BOTW great fairy locations: how to find every fountain in Hyrule
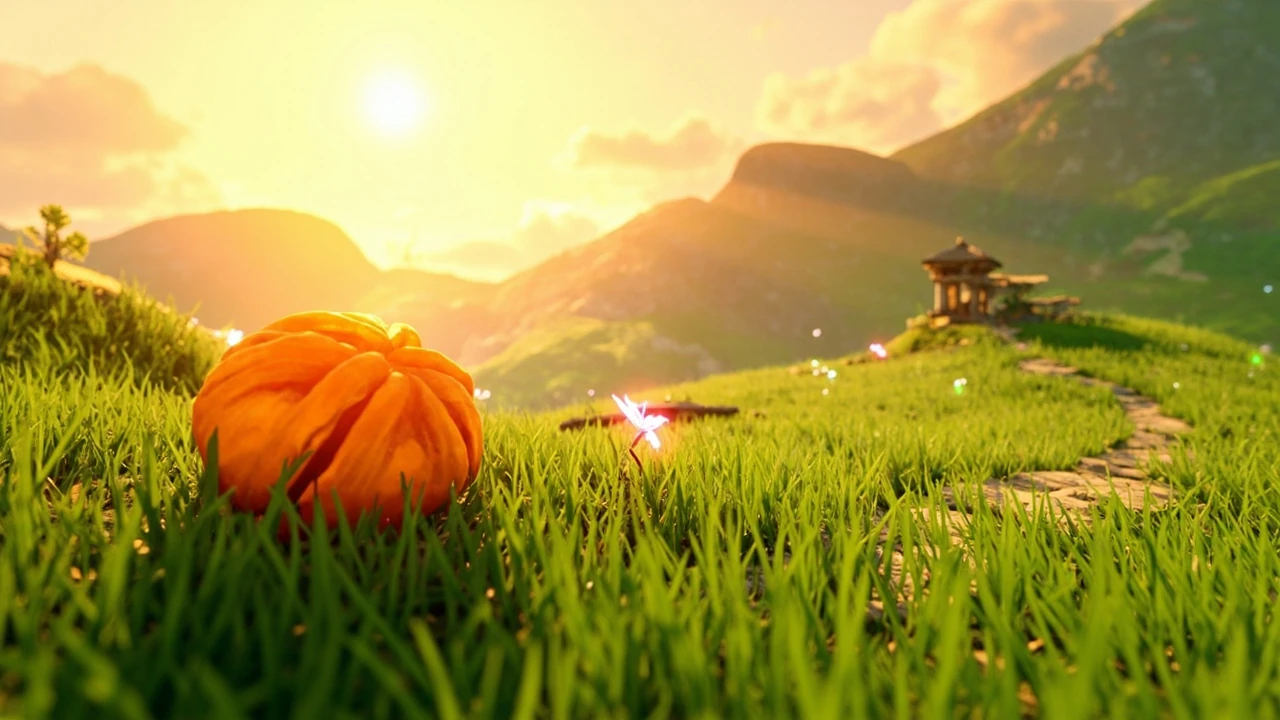
Each of the four Great Fairy fountains in The Legend of Zelda: Breath of the Wild hides behind a closed orange flower bud, tucked into a different region of Hyrule. You can usually spot the flower from a tower or a nearby ridge, then approach the bud to trigger the encounter. Once you pay the requested rupee cost, the fairy bursts from the flower, opens a permanent fountain, and begins offering armor upgrades in exchange for crafting materials. Every BOTW great fairy location is optional in the sense that the main quest can be completed without them, but armor upgrades make a meaningful difference in survivability once you start exploring tougher regions and boss rematches.
This guide covers the four BOTW great fairy locations, the rupee price you should expect at each one, what you can do once the fairy is released, and a few common mistakes players run into when they try to rush the upgrades. It also explains how the unlock order affects the cost and upgrade tier across the whole set, which is the single biggest decision you will make around this system.
How the Great Fairy system works in Breath of the Wild
Inside each of the four closed flowers lives a Great Fairy who refuses to emerge until you make a donation. The price is fixed per fountain, not per upgrade, and the fountains stay open for the rest of the playthrough once you have paid. After the fountain opens, the fairy offers to upgrade any compatible armor piece you own, from the basic Hylian set to DLC gear added through The Champions’ Ballad or the Master Trials. Each upgrade step adds a star to the piece and increases its defense stat, and many armors also unlock a set bonus at the second or fourth star.
The catch is that the upgrade cost and the number of stars available scale with how many Great Fairies you have already freed. Finding the fountains in a specific order is not required, but the order does change how much you pay and how far you can push an armor set. This is the main reason BOTW great fairy locations matter as a planning question rather than a pure exploration question.
The price and star system at a glance
- One Great Fairy freed: 50 rupees to open, up to one star per armor piece.
- Two Great Fairies freed: 500 rupees to open the second, up to two stars per piece across the system.
- Three Great Fairies freed: 1,000 rupees to open the third, up to three stars per piece across the system.
- Four Great Fairies freed: the last fountain becomes free to open and the system allows up to four stars per armor piece.
These are the standard tiers used by the community and reflected in upgrade behavior. Because the price scales sharply, the order you visit the fountains in is mostly a question of how spread out your rupees are at the moment you decide to commit.
Where to find each Great Fairy: region-by-region map
The four main BOTW great fairy locations are spread across Hyrule in a rough clockwise pattern. The first fountain is closest to the early-game safe zone, while the last sits in the most dangerous region. Plan your route in the order that matches your gear, your rupees, and your comfort with the surrounding enemies.
| Great Fairy | Region | Approximate cost to open | Landmark to use as a waypoint |
|---|---|---|---|
| Cotera | East Necluda, above Kakariko Village | Depends on unlock count | Tal’noh Naeg Shrine clearing |
| Kayasa | Tabantha, south of Totori Lake | Depends on unlock count | Rito Village and Tabantha Tower ridge |
| Mija | Akkala, far northeast | Depends on unlock count | Dah Hesho Shrine on the lake lip |
| Tera | Gerudo Desert, far southwest | Depends on unlock count | Large skeleton in the deep desert |
Cotera: the easiest first stop
Cotera sits in the hills directly above Kakariko Village. From the village, climb the path that leads to Ta’loh Naeg Shrine; the clearing just past the shrine holds the closed orange flower. This is the closest of the BOTW great fairy locations to the early-game safe zone, and many players free Cotera on their way to Hateno or to upgrade the Hylian set they receive from the Old Man at the beginning of the game.
The path is short, the enemies are limited, and there is no environmental hazard beyond the usual rain and cold nights of the Dueling Peaks region. Because the cost at Cotera depends entirely on how many other fountains are already open, the usual advice is to visit her first so the price stays at the lowest tier.
Kayasa: the Tabantha tower glide
Kayasa lives in the Tabantha region, south of Totori Lake and the Rito Village. The cleanest route is to climb Tabantha Tower, look south along the ridge, and glide down toward a visible green flower bud. The bud is the closed fountain, and small pink fairies gather nearby, which makes the spot easy to confirm before you commit to the descent.
The Tabantha cold is the main obstacle. Without a cold-resistance armor piece or a fire-based meal, the climb to the tower and the glide toward the fountain will eat through your hearts. Players who have already freed Cotera can use the upgraded Snowquill set to skip most of this, which is a small example of how the four BOTW great fairy locations feed back into each other.
Mija: the Akkala ridge and the orange grove
Mija is the most remote of the four and sits in the far northeast of the Akkala region. Climb the Akkala Tower and look east, past Dah Hesho Shrine, until you spot a cluster of green, yellow, and orange trees. The closed flower bud sits at the southeastern lip of the lake, just inside that colored grove. From the tower, the glide is long, so plan a stamina bar that can carry you past the cliffs and into the trees.
The Akkala coastline is also a Lizalfos and Octorok hot spot, so the path between the shrine and the flower is rarely quiet. Once you reach the bud, the encounter itself is identical to the others: the fairy asks for a donation, then offers the same upgrade rules as Cotera and Kayasa.
Tera: the skeleton in the Gerudo sandstorm
Tera is the final and most dangerous of the BOTW great fairy locations. She is buried in the deep Gerudo Desert, under a large skeleton that you can use as a landmark once the sandstorm clears. To reach the skeleton you usually need either heat-resistance gear, a cooling elixir, or a combination of both, plus a Sand Seal to cross the deep desert faster than the on-foot sprint allows. Some areas also blank the map while the sandstorm is active, so the landmarks that help in other regions will not always show up here.
The reward for the extra effort is the same upgrade interface, but freeing Tera is the only way to push any armor piece to its fourth star. That makes her the natural final step in the four-fountain route.
Choosing an unlock order for the four fountains
Because the rupee cost and the number of available upgrade stars are both tied to the running total of freed Great Fairies, the order you visit the four fountains in is a strategic decision rather than a story beat. The game never forces an order, and the only mechanical effect of a different order is the rupee cost you pay and how many stars you can apply while you still have only one, two, or three fountains open.
Order 1: Cotera, Kayasa, Mija, Tera (recommended)
This is the cheapest path through the system. Cotera opens at 50 rupees because she is the first fountain you free, Kayasa opens at 500, Mija at 1,000, and Tera opens for free. You will only have one star available until you free Kayasa, two stars until you free Mija, and so on, which is usually fine because the early upgrade materials are also the cheapest to gather. If you want a low-stress route through the four BOTW great fairy locations, this is the order to follow.
Order 2: Cotera, Mija, Kayasa, Tera
Some players prefer to clear the Tabantha region after they have unlocked the Rito Village quests and the Vah Medoh boss, which means Kayasa gets opened third rather than second. The total rupee cost is identical to the recommended order, but the second fountain to open is Mija, which means you can push a chosen armor set to two stars earlier if you happen to be in Akkala for the regional storyline or for the Tarrey Town side quest chain.
Order 3: Tera first (not recommended)
Tera is the only fountain that is genuinely dangerous to reach, and opening her first means you pay 1,000 rupees for the privilege of unlocking the system with the worst possible access. You can still do it, and the upgrade interface behaves the same way once you open the remaining fountains, but the order inverts the cost curve and is only worth it if you are specifically running a low-rupee or a high-stakes challenge run.
| Unlock order | Cost at each fountain | Stars available after last unlock | Best for |
|---|---|---|---|
| Cotera, Kayasa, Mija, Tera | 50, 500, 1,000, 0 | 4 | Standard play, low-rupee early game |
| Cotera, Mija, Kayasa, Tera | 50, 500, 1,000, 0 | 4 | Players doing Akkala before Tabantha |
| Kayasa, Cotera, Mija, Tera | 50, 500, 1,000, 0 | 4 | Players who head to Rito Village first |
| Tera first | 1,000 at every prior fountain and 0 at Tera | 4 | Challenge runs only |
What to upgrade first once the fountains are open
Each Great Fairy uses the same set of upgrade rules: you trade rupees, a base armor piece, and a small bundle of regional materials for one extra star on that piece. The materials scale with the tier, so the first star on a piece is cheap, the second star is more expensive, and the fourth star demands a mix of monster parts and rare minerals or flora. BOTW great fairy locations all share this economy, which means your upgrade plan is really a plan about which armor sets to invest in.
A simple priority list helps a lot of players:
- One all-purpose set, usually the Ancient set, that you push to four stars as soon as you can afford the materials.
- One environmental set, usually Snowquill for cold or Gerudo for heat, that you push to two stars early to make the next fountain safer to reach.
- One stealth or damage set, depending on whether you prefer to avoid combat or to finish it quickly, and only after the first two are comfortable.
The reason this order works is that armor defense stacks with the four-star upgrade path, so a single Ancient Greaves set at four stars absorbs a lot more damage than three different sets at one star. The Great Fairies are happy to upgrade any piece you bring them, but the rupees and materials are limited, so it pays to focus them on one set first.
Materials and rupee costs for each star level
Each star on a piece of armor requires a small bundle of materials drawn from the region or monster family associated with the armor. The exact list is printed on the upgrade prompt, so the fountain itself is the canonical source. As a rule of thumb, the first star is cheap and uses common drops, while the fourth star uses rare monster parts, gemstones, and large quantities of rupees.
| Star level | Typical rupee cost | Typical material tier |
|---|---|---|
| First star | Low, in the tens | Common regional items and basic monster parts |
| Second star | Moderate, in the low hundreds | Mid-tier regional items and tougher monster parts |
| Third star | High, several hundred | Rare regional items, Lizalfos or Moblin parts |
| Fourth star | Very high, in the thousands | Rare monster parts, gemstones, special flora |
These are general bands rather than exact costs, because every armor set has its own material recipe. The important point is that the cost ramps up sharply toward the fourth star, which is another argument for picking a single set to push to four stars before spreading upgrades across many sets.
Common mistakes when hunting the Great Fairies
Most of the friction around BOTW great fairy locations is caused by underestimating the environment rather than by the encounter itself. The fountain cutscene is short, the payment is fixed, and the upgrade interface is the same at every flower. The hard part is the path in.
- Forgetting cold or heat resistance. Tabantha and Gerudo will chip your hearts long before you reach the bud, so a Snowquill piece or a cooling elixir should be on before you leave the last safe zone.
- Gliding with too little stamina. The Akkala and Tabantha glides both demand a full stamina wheel or a stamina-restoring meal, because the ridge is too far for a half-empty bar.
- Spending rupees on cosmetics before the fountains are open. The first two Great Fairies cost 50 and 500 rupees, so it is worth holding the early wallet in reserve for the unlock fee rather than burning rupees on dye shops.
- Opening Tera before the others. Tera is free to open as the fourth fountain, but the encounter is the most expensive if you reach her first.
- Upgrading too many sets. The first star is cheap, but the fourth star is not, and many players end up with half a dozen one-star sets and no four-star armor.
How the Great Fairies interact with DLC armor
Both DLC expansions, The Master Trials and The Champions’ Ballad, add armor sets that are valid targets for the same upgrade rules. The same four BOTW great fairy locations, once opened, accept every DLC armor piece, and the cost of each star follows the same bands as the base-game sets. The Phantom set, the Majora’s Mask, the Tingle set, and the Ancient set from the base game all live in the same upgrade queue at the fountain prompt.
The practical effect is that finishing the DLC content does not unlock a new tier of Great Fairy and does not change the four-star ceiling. It only changes which armor pieces are available for the same four-star upgrade path. Players who plan around the DLC often prioritize the Phantom set, then the Ancient set, and leave the cosmetic sets for the second round of upgrades.
How Great Fairies compare to Malanya, the Horse God
Malanya shares the same hidden-fountain idea but offers a different service. She is found south of Highland Stable in the Lake Hylia region, and her price is a flat 1,000 rupees regardless of how many other fountains you have freed. Once paid, she resurrects any horse registered at a stable, including rare horses like the Royal White Stallion, the Giant Horse, and Epona from the Super Smash Bros. link data. Malanya does not upgrade armor and does not count toward the Great Fairy unlock counter, so she is best treated as a separate side facility rather than a fifth BOTW great fairy location.
The reason to mention her here is that the discovery experience is similar: a hidden fountain, a rupee cost, and a permanent unlock of a useful service. Many players stumble into Malanya on the way to one of the four main fountains or while chasing shrines in the Lake Hylia area, so it helps to know that her cost and behavior are different.
How to plan a route that covers all four fountains
A clean route through the four BOTW great fairy locations follows the natural order of the regions, the shrines you probably want to complete along the way, and the shrines or towers that give you the easiest glide. The recommended path is Kakariko to Cotera, then a Tabantha Tower climb to Kayasa, an Akkala Tower glide to Mija, and finally a Gerudo Tower climb into the deep desert for Tera. Along the way, each tower unlocks the surrounding map and a fast-travel point that doubles as a waypoint back to the fountain for upgrades.
A few practical checkpoints help:
- Hold at least 1,550 rupees before you start the route if you want to pay the full cost in one trip. That covers 50, 500, and 1,000 rupees in the recommended order.
- Stock at least one heat-resistance dish and one cold-resistance dish in case your armor set is not ready for the climate.
- Keep one stamina-restoring meal or elixir on hand for the longer glides from Akkala and Tabantha towers.
- Mark each fountain on the map as a fast-travel point after you open it so you can return later to drop off upgrade materials without crossing the region again.
Verifying your upgrades after each fountain
Once a fountain is open, the upgrade menu is the only place that tells you the current star cap, so it is worth opening it once after each new BOTW great fairy location you free, just to confirm that the system has registered the new tier. If the menu still shows a one-star cap after you have freed a second fairy, fast-travel out and back, or reload the auto-save, and the cap should update. This is a small habit that saves a frustrating trip to the wrong fairy later.
It is also worth double-checking the set bonus for the armor you are upgrading. Many sets only unlock their bonus at the second or fourth star, and the menu lists both the defense stat and the bonus for each star level. Players who want a specific bonus, like the swim-speed boost from the Zora set, sometimes find that they have been farming materials for the wrong star tier.
Why the four fountains still matter in a post-game save
Once all four Great Fairies are open and the four-star cap is in place, the system stays active for the rest of the save, including after the final boss, the DLC content, and any new playthroughs that use the same user profile. That means the time you spend on BOTW great fairy locations early in a run is paid back across all of the armor upgrades you will ever make in that save, including armor pieces you pick up months later. A single Great Fairy fountain opened in the first ten hours can still be upgrading new armor in the hundredth hour.
The fountains are also one of the few systems in Breath of the Wild that gets strictly more useful over time, because new armor pieces, new DLC sets, and new amiibo drops can always be fed back into the same four interfaces. Planning a route that opens all four fountains is a small time investment for a permanent upgrade facility.
Troubleshooting: when a fountain does not open
A handful of players run into situations where the closed flower refuses to trigger the encounter, usually because of a story or shrine flag that is not set yet. The usual fixes are to complete the nearby shrine, to leave and re-enter the area, or to wait for a weather change if the cutscene is gated behind a specific condition. The four main BOTW great fairy locations are not gated behind main story progress, but they are gated behind a stable framerate, so dropping to a low-end or unstable build can cause the cutscene to fail to trigger.
Another common issue is opening the wrong flower. A few smaller flower buds around Hyrule release single fairies that refill your hearts in exchange for a quick catch, and those are not the Great Fairy fountains. The four Great Fairy fountains are always the very large, orange, closed buds, and the pink fairies in the surrounding clearing are a useful tell that you are in the right place.
Frequently asked questions
How many Great Fairy fountains are there in Breath of the Wild?
There are four main Great Fairy fountains in the base game: Cotera, Kayasa, Mija, and Tera. Malanya, the Horse God, is a separate hidden fountain that uses the same visual idea but offers a different service.
Does the order I free the Great Fairies matter?
The order does not change the final result, because all four fountains together unlock the full four-star upgrade cap. It does change the rupee cost and the number of stars you can apply along the way, so the order is mostly a budgeting and pacing decision.
What is the cheapest way to open all four Great Fairy fountains?
The cheapest path is to free Cotera first, then Kayasa, then Mija, and finally Tera. The total rupee cost in that order is 50, 500, 1,000, and 0, for a combined cost of 1,550 rupees.
Can I upgrade the same armor piece at different fountains?
Yes. Once a piece of armor has been started at one fountain, you can return to any open Great Fairy fountain and continue adding stars. The piece itself remembers its star level across fountains, so you are not forced to use the same fairy for the same piece.
Do the Great Fairies restock after every blood moon?
The four Great Fairy fountains stay open permanently once you have paid the rupee cost. The blood moon does not close them, and the upgrade menu is always available, although the materials still need to be gathered fresh on each visit.
Are Great Fairy upgrades affected by Master Mode or higher difficulties?
The upgrade rules are the same on Master Mode, including the same rupee costs, the same star caps, and the same material recipes. The difference is that Master Mode places stronger enemies in the path to each fountain, which makes the route itself harder even if the system is unchanged.
Can I get to the Gerudo fountain without heat resistance?
You can cross small parts of the desert with a cooling elixir or by standing in the shade of the skeleton itself, but the long approach from the Gerudo Tower demands either heat-resistance armor, a stacked cooling meal, or both. Plan for heat resistance before you commit to the deep desert glide.
Do the Great Fairy fountains count as shrines for the Hyrule Compendium or the map completion percentage?
The fountains show up as discoverable points of interest on the map and contribute to map completion, but they are not shrines and do not count toward the shrine-based objectives. They are a separate category of discovery, similar to stables and labyrinths.
Is there a way to preview armor upgrades before I commit materials?
The upgrade menu at each fountain shows the required materials and the resulting stat change before you confirm the upgrade. If the materials are missing, the menu lists exactly which items you need and how many, which makes the fountain the best source for upgrade planning.
What happens if I start a new save file with the same Switch profile?
Each save file has its own set of unlocked fountains and its own upgrade progress. The Switch profile does not carry Great Fairy progress between saves, so you will need to open the fountains again on a new save if you want the upgrade interface on that file.




Leave a Reply