
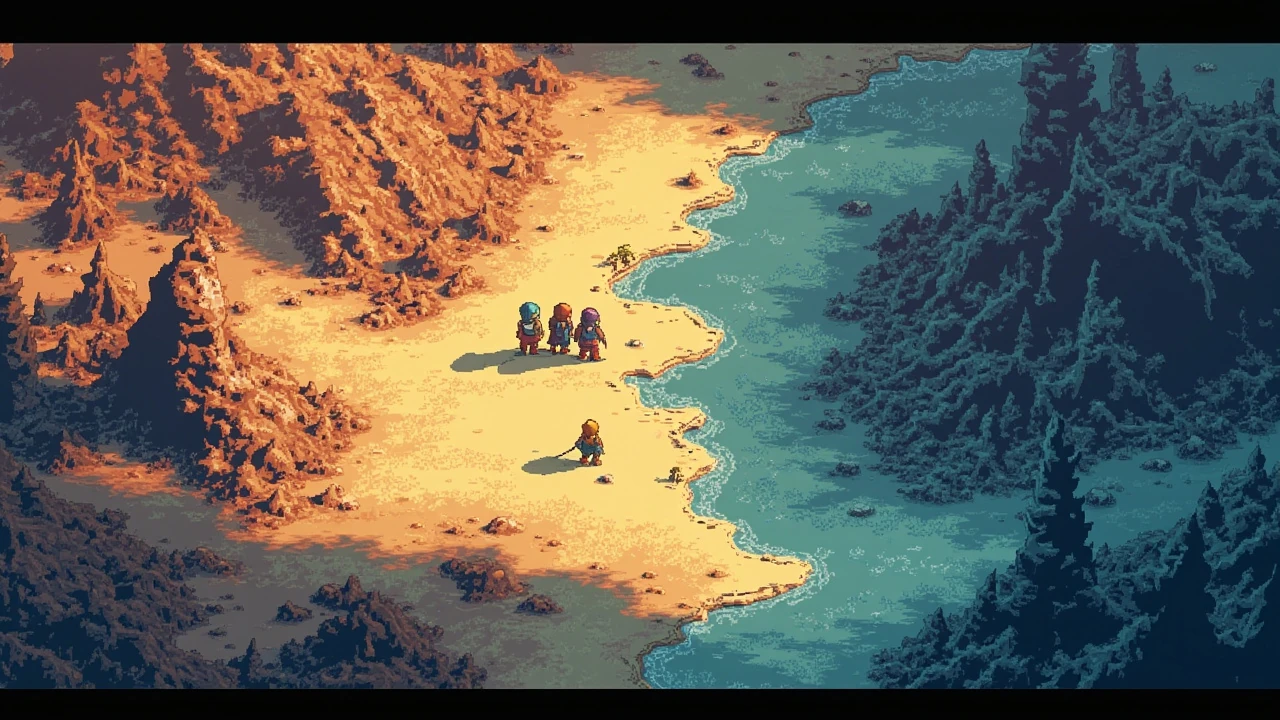
ff6 walkthrough: how to read a JRPG route through a developer’s eyes
Final Fantasy VI is a 60 plus hour Japanese role-playing game built around a deliberate two-act structure: a linear first half that hands the player a fixed cast, and a wide, side-quest heavy second half that breaks the party apart and asks the player to rebuild it. Any honest ff6 walkthrough has to respect that split, because the same player who cruises through the opening hours can lose hours in the World of Ruin without a clear sense of which recruits, dungeons, and optional bosses actually gate the ending. This guide treats the game the way a developer would: as a sequence of systems, encounter designs, and route decisions, not as a single checklist.
It also helps that the same game has been released on multiple platforms with the same core design. The original 1994 Super Famicom and Super Nintendo release, the PlayStation and Game Boy Advance ports, and the Final Fantasy Pixel Remaster edition on PC, PS5, and Nintendo Switch all share the same encounter table and dungeon layouts, although menus, save systems, and bonus content differ. The walkthrough structure below works across those versions, with version notes where a mechanic, save location, or bonus encounter changes the route.
Two framing decisions matter before any route planning. First, the World of Balance is mostly linear and the World of Ruin is mostly open. A walkthrough that pretends both halves have the same shape will mislead the reader. Second, the game rewards curiosity: hidden Espers, missable characters, optional dialogue, and a few secret bosses only appear if the player returns to specific maps at specific times. The aim here is to give a route that catches most of those without turning the experience into a checklist tour.
How Final Fantasy VI’s two-act design shapes the route
Final Fantasy VI is split into the World of Balance, where the player follows a fixed story from Narshe to the Floating Continent, and the World of Ruin, where the surviving cast is scattered across a broken world map and the player chooses where to recruit them. The split is not cosmetic. It changes the level of freedom, the encounter density, and the kinds of decisions the route has to plan around.
In the World of Balance, the player’s route is dictated by story events: which town to defend, which dungeon unlocks the next Esper, which airship section triggers the act break. A walkthrough in this half is essentially a story path with light side content. In the World of Ruin, the same characters are no longer in the same party, the world map is no longer fully explorable, and the player’s main task is to walk, fly, and occasionally swim back through old locations to pick up the missing party members and resume the main quest at the appropriate point.
This is also where the encounter design becomes interesting. The original developers reused many map tiles between the two worlds but changed encounter tables, NPC placements, and treasure chests. A room that was a save point in the World of Balance can be a treasure room in the World of Ruin. For a walkthrough, the practical consequence is simple: the second visit to a familiar area is not the same as the first, and the route has to be planned twice.
Prerequisites before starting the route
Before mapping a run, a few practical decisions define what kind of walkthrough the player actually wants. These choices change the route more than any single tip about a specific dungeon.
- Pick a version. The Pixel Remaster editions add modern conveniences such as a toggle to disable random encounters, an in-game map overlay, and a tweaked save-anywhere system. The Super Nintendo original keeps the classic save-at-save-points flow and is the reference for many community guides.
- Decide on completion scope. A main-story route ends after the final dungeon; a completionist route adds the optional bosses, hidden Espers, and the bonus ending. A development-focused route often stops after the World of Ruin recruitment phase to study the encounter and map reuse, then resumes at the final dungeon.
- Check the party slot rules. Espers teach spells through level-ups, and a small mistake in the first act can lock a character out of a key spell until the second act. Spell learning is permanent, so a first-time player who plans a magic-heavy build should keep that in mind before they assign Espers.
- Track missable recruits. Several characters, including a couple of optional ones, can be permanently missed if the player moves past their recruitment trigger without the right party or in the right chapter.
These are not optional details. A walkthrough that ignores them forces the player to either restart or accept a suboptimal ending.
World of Balance: the linear half
The World of Balance is the part of any ff6 walkthrough where the route can be drawn almost as a straight line. The main beats are Narshe, the return to the Imperial capital, the siege of the Magitek Research Facility, the opera, the confrontation in the Floating Continent, and the fall that opens the second act. Each beat has at least one dungeon, and most dungeons introduce a new Esper that teaches key spells to the active party.
The route is also where the encounter design is most readable. Many early dungeons are short and linear, with a single mini-boss that demonstrates a specific mechanic. The game uses those mini-bosses to teach players how to manage the new mechanics later, including how to deal with the game’s first real difficulty spikes. A walkthrough that flags those teaching encounters helps the player understand why the designers placed them, which is useful for developers studying classic JRPG pacing.
Key route beats in the first act
The table below summarizes the main story beats that any World of Balance route has to cover. It is not a full dungeon list, but it is the spine that most walkthroughs share.
| Beat | Main location | Esper or reward | Route role |
|---|---|---|---|
| Escape and the frozen esper | Narshe mines | First Esper in the game | Tutorial dungeon and Esper introduction |
| Return to the capital | Imperial capital and surrounding area | Story progression only | Establishes the Imperial threat and party dynamic |
| Return to Narshe | Narshe and surrounding maps | Story progression only | Midpoint regroup and equipment refresh |
| Magitek facility | Magitek Research Facility | Magitek armor ability for one character | Switches the encounter to mechanical themes and trains the player on the Magitek armor mechanic |
| Opera house | Opera house and Jidoor | Story progression only | Sets up a rescue mission and shifts the cast temporarily |
| Floating Continent | Multiple dungeons on a flying continent | Multiple Espers and a major character death | Climactic dungeon that ends the World of Balance |
The exact Esper rewarded at each step varies by version, but the route shape is consistent. A walkthrough does not need to list every chest and NPC in this act to be useful, but it should flag the points where the player can miss a permanent character, an Esper, or a key piece of equipment.
World of Ruin: the open half
The World of Ruin is where a walkthrough has to do real work. The main cast is broken up across a damaged world map, optional dungeons appear in new places, and the route depends on which characters the player has already recruited. The result is less a fixed order and more a small set of orderings that all work.
A reasonable recruitment path for a completionist route is: pick up the first returning party member, use the new airship to scout the broken map, recruit the second and third characters in either order, then enter the long dungeon chain that ends with the rebuilt party fighting the late-game bosses. A casual route can follow roughly the same order but skip optional dungeons and return to them later with a stronger party.
The order below is one common path. It is not the only valid order, and a serious walkthrough should note where the player can swap steps. The most common safe order is to start in the lower-right region, work back to the upper continent, and finish with the central late-game dungeon chain.
| Step | Region | Main recruit or beat | Why this step |
|---|---|---|---|
| 1 | Lower continent, eastern islands | First returning party member | Reopens the broken world map and gives access to the new airship |
| 2 | Central continent, search for the thief | Optional thief character with steal utility | Restores a versatile character and unlocks side content |
| 3 | Central continent, optional dungeon chain | Hidden Esper and reward items | Spells and equipment for the late-game build |
| 4 | Upper continent, ancient castle | Magic-focused character | Completes the magic triangle and opens more side content |
| 5 | Upper continent, hidden dragon area | Strong physical character | Closes the major recruitment gaps before the central dungeon |
| 6 | Central continent, late-game dungeon chain | Multiple story bosses and Espers | Final run toward the ending |
The exact regions and recruitment names are not critical to memorize. What matters is the structure: get the airship, recruit the core cast, pick up the most useful optional characters, and only then commit to the long final dungeon chain. A walkthrough that lets the player do the last two steps in either order is more honest about the route than one that pretends there is a single correct path.
Where the encounter design rewards route planning
For a developer reading an ff6 walkthrough, the most interesting question is not which chest to open but how the game’s encounter design interacts with the route. The original release uses a step-based encounter system. Each map has a hidden counter that triggers a battle when it fills, which means a player who runs a long stretch without battles can briefly enter a state with higher encounter density. A walkthrough that ignores this will leave the player fighting more random encounters than necessary, while a route that uses the counter deliberately can clear most maps in a single dash.
The same idea applies to boss design. The first act’s bosses are designed to test the player’s understanding of a single mechanic, such as elemental weaknesses or the Magitek armor’s skill loadout. The mid-game bosses start combining those mechanics, and the late-game bosses add status effects and turn manipulation. A route that levels the party evenly will face the late game more easily than a route that over-levels one or two characters, because the late-game encounters assume a full bench.
For a completionist or developer-style walkthrough, this is also the point where the route has to decide what to do about the bonus bosses. The most famous optional fight is a late-game boss that tests the player’s understanding of the entire system, including buffs, debuffs, and Esper selection. The boss is fully optional, but the reward is significant, and the route needs to allow for a long preparation phase. A walkthrough that mentions the boss only at the end misses the chance to explain why the route choices earlier in the game matter.
How to read a dungeon in this game
Many walkthroughs reduce dungeons to a list of directions and chests. For Final Fantasy VI, that approach loses the design intent. A more useful pattern is to read each dungeon as a sequence of rooms that introduce one new mechanic, test it once, and then move on. A player who learns that pattern can navigate later dungeons without consulting a guide.
Three checks are useful when reading any dungeon in either world:
- Identify the room that introduces a new mechanic. Most dungeons have one room that requires a new command, Esper, or party member to solve. The path through the dungeon usually leads the player to that room only after a short exploration sequence.
- Find the save room. The game signals save rooms with a distinctive tile or a save crystal. Because the encounter counter resets on map transition, save rooms are also the natural place to pause.
- Locate the optional treasures. Most dungeons hide a small number of optional chests behind a backtrack, a hidden switch, or a secret room. These are the chests that a casual player is most likely to miss and that a completionist walkthrough should mark.
A walkthrough that lays out a dungeon as a list of directions plus these three notes is more useful than a screenshot-by-screenshot route, because the player still has to solve the new mechanic themselves. That is the right amount of help for a game of this length.
How platform differences change the route
Final Fantasy VI has been re-released many times, and the differences between versions are not just cosmetic. The Pixel Remaster editions added modern conveniences that change how a route should be planned, and the older ports have quirks that a walkthrough should mention when relevant.
| Version | Notable changes for route planning | Effect on the walkthrough |
|---|---|---|
| Super Nintendo original (1994) | Reference encounter tables and save system | The baseline for most older community guides |
| PlayStation port | Loading screens, slightly different audio, additional bonus content | Minor route impact; bonus content can extend the run |
| Game Boy Advance port | Bonus dungeons and additional Espers | Adds optional content that a completionist walkthrough should cover |
| Pixel Remaster on PC and PS5 (2022) | Toggleable random encounters, modern UI, in-game map overlay | Lets a player plan the route without constant battle interruptions |
| Pixel Remaster on Nintendo Switch (2023) | Same modern conveniences plus portable play | Same route shape as the other Pixel Remaster editions |
The encounter toggle in the Pixel Remaster is the single biggest route change. With random encounters off, the player can sprint between story beats, but the boss difficulty is unchanged, so the route has to plan for the boss fights even if the random encounters no longer slow the player down. A walkthrough written for the original Super Nintendo release can still be used on the Pixel Remaster, but a walkthrough written only for the Pixel Remaster may skip save-room etiquette that older players expect.
Common failure modes along the route
Most problems players run into on a first playthrough are not the boss fights. They are route mistakes, missable content, and small mechanical errors that compound over a long run. The list below is the most common set of issues a walkthrough should call out, in the order they tend to appear.
- Missed optional recruit in the early game. A character available only in a small window in the first act is easy to miss because the player is focused on the main story.
- Wrong Esper assignment. Permanently teaching the wrong spell to a character can lock that character out of a role for the rest of the run.
- Skipping the save room. The original release saves only at save points, and missing a save before a long dungeon can cost the player significant progress.
- Ignoring the encounter counter. Running a long stretch without entering a battle can trigger a denser encounter cycle that wastes time on the way to a story beat.
- Entering the late-game dungeon chain with a half-finished party. Several late-game encounters assume a full bench, and a route that recruits the optional characters too late makes those fights much harder than they need to be.
A good walkthrough mentions each of these at the point in the route where it is most likely to happen, rather than only in a generic “tips” section. The placement matters because the player is most receptive to a warning right before the mistake is possible.
A practical route checklist
For readers who want a one-page summary, the route can be reduced to a short list of checkpoints. This is the list to keep open while playing, with the longer explanations in the sections above. It is intentionally short because the rest of the article already covers each step in detail.
- Set up the run: pick a version, decide on completion scope, and confirm the player is on the right save slot.
- World of Balance: Narshe, Imperial capital, return to Narshe, Magitek facility, opera, Floating Continent. Pick up the first Esper and the early optional recruit at the right trigger.
- Act break: the story removes several party members and opens the World of Ruin with a smaller, more open world map.
- World of Ruin, early: reunite with the first returning party member, secure the new airship, and scout the broken map for missed dungeons.
- World of Ruin, mid: recruit the optional characters, clear the optional dungeons, and pick up the late-game Espers in a sensible order.
- Late game: enter the central dungeon chain only once the party is full and the equipment is set, and prepare for the final bosses.
- Optional ending: with a high hidden stat and the right party decisions, the game shows a short bonus scene. This is not required to finish the game.
This is the same shape any honest walkthrough will eventually arrive at, even if the exact dungeon and recruit names differ between sources. It is the safe route through a long game with a deliberately open second half.
Frequently asked questions
How long does an ff6 walkthrough run actually take?
A main-story-only run of Final Fantasy VI takes around 35 to 45 hours, depending on how much optional content the player explores. A completionist run that aims to recruit every character, find every Esper, clear the optional dungeons, and fight the bonus boss usually takes 60 to 80 hours. The Pixel Remaster editions with the encounter toggle can shorten either run by a noticeable amount, because the player spends less time on random battles.
Should a first-time player use a walkthrough at all?
Using an ff6 walkthrough is a personal choice. The first act is mostly linear and does not need a guide, but the World of Ruin is open enough that a new player can spend many hours without finding the optional characters. A compromise many players prefer is to use a walkthrough for the recruitment phase in the second act and to play the rest of the game without one.
Which version is best for a first-time player?
The Pixel Remaster editions on PC, PS5, and Nintendo Switch are the most accessible for a new player, because the modern conveniences reduce the friction without changing the encounter design. Players who want the original feel usually prefer the Super Nintendo version, although that requires a working console or a legal emulation setup. A walkthrough written for one version will largely work on the others, with small notes for any version-specific dungeon or bonus.
What is the right level to enter the late-game dungeon chain?
The game does not display a recommended level, and the answer depends on the party size and equipment. As a rough rule, a party that is around level 40 to 45 with mixed equipment and at least one character trained in healing magic can clear the late-game chain without excessive grinding. A walkthrough focused on the developer side of the game should mention this as a soft target rather than a hard requirement, because the encounter design also rewards equipment and spell selection.
Are the bonus bosses required to finish the game?
The bonus boss is fully optional and is not required to reach the normal ending. A walkthrough that targets the bonus boss will spend additional time on equipment, spell selection, and party preparation, but a player who is happy with the standard ending can ignore that fight entirely. The decision usually comes down to how much time the player wants to invest after the main story is complete.
Can the player miss a permanent character?
Yes. Several characters are only available in a narrow window during the first act, and a few of the optional characters in the second act require the player to reach a specific map at the right time. A walkthrough that lists the recruitment triggers at the point in the route where they appear is the most reliable way to avoid missing anyone. Restarting from a save made before the trigger is usually the simplest recovery.
What is the difference between an Esper and a spell in the route?
Espers are summonable creatures that teach spells to the characters who have the Esper equipped when they level up. The spells are permanent for that character once learned. A walkthrough that treats Espers as the game’s progression system, rather than as a list of summons, is closer to how the game is designed and helps the player plan their spell assignments.
Does the route change with the encounter toggle in the Pixel Remaster?
The shape of the route does not change, but the pace does. With random encounters off, the player can move between story beats without the long stretches of fighting that the original release expects. The boss fights are unchanged, so the route still has to plan around them. A walkthrough written for the original release can be used on the Pixel Remaster, but a walkthrough that assumes the encounter toggle is on may feel too sparse for a player on the Super Nintendo version.
Is the World of Ruin really open, or is there a hidden correct order?
The World of Ruin is genuinely open. The developers designed the second act so that the player can recruit the missing party members in nearly any order, with the late-game dungeon chain as the only real gate. A walkthrough that presents a single strict order is over-constraining the route, while a walkthrough that lists a safe order and notes the points where the player can swap steps is closer to the actual design.
Where can a player find a deeper reference for the World of Ruin?
For players who want a full chapter-by-chapter reference, the IGN walkthrough for Final Fantasy VI is one of the longest-running public references and covers both the World of Balance and the World of Ruin with detailed maps, including the route through the two acts. It is a useful companion to this page for readers who want every chest and NPC covered.


Leave a Reply