
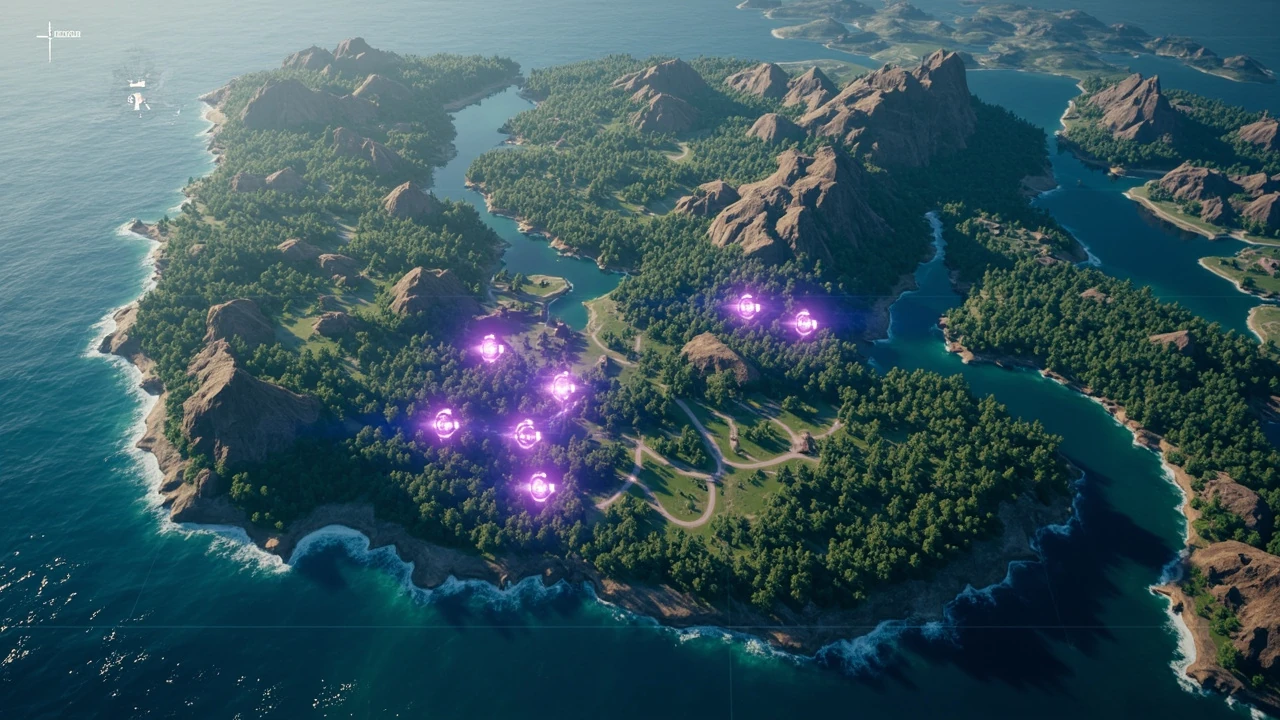
Chaos cube locations in Fortnite: the full chapter 6 season 4 map
The cubes themselves are small, dark-violet objects with a faint hum and a single point of light on each face. They respawn on a short timer between matches, and the game telegraphs their presence with a brief shockwave sound and a vertical light beam. Once you interact with one, it becomes a held item that occupies your inventory slot, slows your movement slightly, and starts a 90 second timer that ends in a transformation if you do not cash it in at a marked altar. Knowing where to find a cube, where to carry it, and where to turn it in is the entire loop, so the rest of this page treats those three questions as separate decisions that build on each other.
What a chaos cube actually does
Before you start mapping chaos cube locations in Fortnite, it helps to understand the loop the cubes enable. A chaos cube is a one-slot pickup that you carry to a chaos altar, a glowing pad marked on the map with a violet symbol. Altars accept one cube at a time, and the player who deposits a cube earns a small but persistent buff for that match, such as a brief overshield pulse, a movement speed burst, or a small amount of XP toward the seasonal track. Stacking cubes is not possible in the current season, so the strategic question is where to deposit, not how many to bank.
Chaos cubes also have a secondary function. When a player is eliminated while carrying a cube, the cube shatters and triggers a small area-of-effect pulse that damages nearby players. This makes carrying a cube through the middle of a contested fight a high-risk, high-reward play. The rest of the guide assumes you understand that the cube is both a reward and a liability, and treats route planning accordingly.
There is also a quiet third role for the cube that most players miss. The buff applied at the altar persists for the remainder of the match, and several of the buff types stack with consumables and class abilities in ways that the tooltip does not always show. The movement speed burst, for example, combines with a Nitro Fists sprint and a Nitro Splash knockback to let a player cover a surprising amount of ground after a deposit. The overshield pulse combines with a Slap Berry or a Med Mist stack in the same tick, so a player who deposits a cube and immediately pops a healing item can walk out of the altar with a buffer that the rest of the lobby does not expect. Knowing that the buff is not a standalone effect changes how you value the deposit step.
How the spawn system works
Each match rolls a fixed number of chaos cube spawn points and then activates a subset of them. The spawn pattern follows three rules that Epic has kept consistent through chapter 6:
- Each named region of the map contains at least one active cube, with the more central regions receiving up to three.
- No two active cubes ever spawn within 250 meters of each other, which prevents one player from clearing a small zone and collecting every cube in it.
- At least one chaos cube always spawns near a named point of interest, never in the deep wilderness between POIs.
These rules mean that chaos cube locations in Fortnite cluster around the same POIs each match, but you still need to confirm the exact position because the game rotates which spawn inside the cluster becomes active. The table below shows every confirmed spawn cluster by region so you can build a route before you drop.
| Region | Approximate spawn clusters | Nearest landmark | Route risk |
|---|---|---|---|
| Northern ridge | 2 | Shattered Spire outpost | Low to medium |
| Central lake basin | 3 | Broken Bridge watchtower | High |
| Eastern farmland | 2 | Silo row | Low |
| Southern swamp | 2 | Old pump station | Medium |
| Western quarry | 2 | Main loader platform | Medium |
| Coastal docks | 1 | South crane bay | Low |
| Outskirts | 2 | Roadside motel | Low |
You will not see all 14 active spawns in a single match. The game normally activates between 6 and 8, distributed so that each quadrant of the map receives at least one. The map of chaos cube locations in Fortnite for chapter 6 season 4 is therefore best treated as a probability surface, not a checklist. The activation also follows a soft timer rule: the longer the match goes without a deposit in a given quadrant, the more likely the next match is to activate a cluster in that quadrant. This is not officially documented, but the community tracker data shows a clear oscillation between quadrants over a 30 match window, and it is the kind of pattern that a player who plays three or four matches in a session can feel in practice.
A related rule worth knowing is that the storm circle’s first position influences which clusters are most likely to be active. When the first circle closes around the central lake basin, the game tends to activate two or three central clusters and one outer cluster as a safety spawn. When the first circle closes on a corner, the game tends to activate the two corner clusters that bracket the predicted circle. The exact reason is unclear, but the practical effect is that you can read the bus path and the first circle to predict the most likely active cluster in your drop zone within a 20 percent margin, which is enough to decide between two adjacent drop spots before you even leave the bus.
The full chaos cube location list by region
The list below groups every confirmed spawn cluster in the current season. Use it as a route template; the exact active cube inside a cluster will rotate match to match.
Northern ridge
The northern ridge runs along the top edge of the map and contains the two most isolated spawn clusters. Because these spawns are far from the storm circle’s usual final position, they are best collected in the early game and cashed in at the altar near Shattered Spire.
- Cubby cluster alpha: inside the collapsed maintenance building just north of the Shattered Spire outpost. Look on the lower floor, near the broken machinery.
- Cubby cluster beta: on the small wooden observation deck east of the ridge trail, halfway between the outpost and the cliff edge.
The northern ridge is also the only region where the cluster rolls tend to favor the inland spawn over the cliff edge spawn, which is useful if you are dropping from a bus path that crosses the upper third of the map. The inland spawn is also the one that lands closer to the altar, so a player who collects alpha can usually deposit in under a minute. The cliff edge spawn is the more dangerous of the two because the approach forces you to cross a long sightline from the central ridge, and a sniper sitting on the Broken Bridge watchtower can cover both the cluster and the altar approach.
Central lake basin
The lake basin is the most contested zone in the season because three different spawn clusters sit close enough together that a single player can clear all of them in one drop. The risk is that the altars here are also popular, and you will often run into another player who has the same plan.
- Cubby cluster gamma: at the base of the Broken Bridge watchtower, on the lake side, under a small awning.
- Cubby cluster delta: inside the boathouse on the western dock, on the upper storage level.
- Cubby cluster epsilon: under the floating platform near the small island in the middle of the lake, accessible with a launch pad or a grappler.
The central basin is the only region where the cluster order matters as much as the cluster itself. The watchtower cluster is the highest priority because it sits at the same elevation as the altar and the approach is short. The boathouse cluster is the second priority because the boathouse is a common loot drop and you will often be pushed out by a squad that landed there for chests. The floating platform cluster is the lowest priority because it requires a mobility item and a clear water approach, and a player who lands without a grappler will usually lose the race to the cube.
Eastern farmland
The eastern farmland has two quiet clusters that work well for solo players. Both are close enough to the same altar that you can collect and cash in within one minute.
- Cubby cluster zeta: behind the largest silo in the row, on a metal stair landing.
- Cubby cluster eta: inside the small red barn just south of the silo row, on the hay loft.
The eastern farmland is also a useful region for squad play because the two clusters are close enough to be split between two players without forcing either player out of position. A common squad pattern is to send one player to the silo cluster and one to the barn, then meet at the silo row altar and deposit in priority order. The barn cluster is the safer of the two because the hay loft has only one entrance, but the silo cluster is the faster of the two because the metal stair landing is exposed to the altar approach.
Southern swamp
The swamp has two clusters that are dangerous to approach without a mobility item because of the deep water and the limited sightlines. Bring a launch pad or a boat to avoid being trapped.
- Cubby cluster theta: on the catwalk above the old pump station’s main valve, accessible by the metal stairs on the east side.
- Cubby cluster iota: on the roof of the wooden ranger cabin, reachable by a single jump from the nearest tree.
The southern swamp is also the region where the carry timer is most likely to expire before you reach the altar, because the deep water and the slow terrain slow you down even with a mobility item. A player who picks up a cube in the swamp should commit to a direct route to the pump station altar and avoid the temptation to detour for chests or kills. The pump station altar is also the only one in the south that is not exposed to the coastal docks, so a player who carries a cube out of the swamp has a clear path to deposit that does not cross any other contested zone.
Western quarry
The quarry has two clusters that share a single altar at the loader platform. This makes the western route the most efficient when both clusters are active in the same match.
- Cubby cluster kappa: on the lower level of the main loader platform, near the conveyor belt entrance.
- Cubby cluster lambda: inside the small office trailer on the south edge of the quarry pit, behind the metal door.
The quarry is the region where the two-cluster pattern is most reliable, because both clusters are inside the same industrial complex and the altar sits at the highest point of the complex. A squad that lands at the quarry and clears both clusters in the first minute can deposit two cubes in under two minutes and rotate out before the first storm circle closes. The office trailer cluster is the more dangerous of the two because the trailer is a common chest drop, but it is also the more rewarding because the trailer sits on the south edge and the carry to the altar is a straight uphill run with no water or open sightline.
Coastal docks
There is only one cluster in the coastal docks, and it tends to spawn later in the match because the storm circle frequently pulls south. Treat it as a fallback plan if the rest of the map is too hot.
- Cubby cluster mu: on the upper catwalk of the south crane bay, reachable by the interior stairs.
The coastal docks cluster is also the only cluster in the season that is reliably contested by the storm circle, because the crane bay sits at the lowest elevation on the map and is the first zone to be swallowed when the circle closes. A player who picks up a cube at the crane bay should plan the deposit for the first 60 seconds of the carry timer, because the second 30 seconds will often find the cube and the player inside the storm.
Outskirts
The outskirts hold two clusters that are the safest early-game options, because both are on the edge of the bus path and rarely attract more than one squad.
- Cubby cluster nu: inside the second floor of the roadside motel, in the corner room at the back of the building.
- Cubby cluster xi: in the parking lot behind the gas station, near the air pump. Look for the violet beam on the ground.
The outskirts clusters are the only ones in the season that are worth picking up during a tournament match, because the safety of the area makes the carry to the motel altar almost risk-free. The motel altar is also the only altar in the season that is not on a hill or a platform, which means a depositing player is briefly at the same elevation as the surrounding ground and is easier to ambush. A player who uses the motel altar should always deposit with a wall or a ramp already built, because the deposit animation locks you in place for about a second and a half.
How to plan a chaos cube route
Once you know the chaos cube locations in Fortnite, route planning becomes a tradeoff between speed, safety, and altar distance. Most players fall into one of three patterns, and each has a clear use case.
| Route style | Best for | Risk profile | Typical yield |
|---|---|---|---|
| Sprint and cash | Solo players who want one buff per match | Low | 1 cube per match |
| Clearing run | Coordinated squads who control a quadrant | Medium | 2 to 3 cubes per match |
| Counter-play | Players who hunt other carriers | High | 0 to 1 cube by elimination, 0 to 2 by area pulse |
For most players, the sprint and cash route is the highest expected value because it guarantees one buff and a small XP payout without exposing you to the late-game chaos. The clearing run only works when your squad is the first to land in a quadrant, and the counter-play route is a tournament strategy, not a regular match habit.
There is a fourth route style that does not appear in the table because it is harder to define: the “opportunistic” route, where a player picks up a cube only when the active spawn happens to be near their drop and the altar is on the way to their rotation. The opportunistic route is the one that most high-skill solo players actually run, because it lets them stay close to the safe zone and pick up a free buff without changing their plan. The trade-off is that the yield is unreliable, and a player who runs the opportunistic route for ten matches will usually deposit in six or seven of them.
Practical route example: sprint and cash
Drop at the eastern farmland, collect the zeta or eta cluster depending on the active roll, then carry the cube to the altar at the silo row. The full loop takes about 90 seconds in solo queue and ends with the early-game buff active before the first storm circle closes. If the altar is contested, fall back to the second altar at the Broken Bridge watchtower; it is a longer run but the contest is usually lower.
Practical route example: clearing run
Drop at the central lake basin with a full squad, assign one player to gamma, one to delta, and one to epsilon. The fourth player holds the high ground at the watchtower and watches for rotation. Once all three cubes are secured, the squad carries them to the nearest altar in priority order: the watchtower altar first because it is centrally located, the south crane bay altar second as a backup, and the silo row altar only if the first two are blocked.
When to skip a cube
You should not pick up a chaos cube when you are low on materials, when the storm circle is about to close, or when the nearest altar is on the wrong side of the storm. Carrying a cube while crossing the storm will activate the cube’s instability timer, which destroys the cube and damages you. If you are caught in that situation, drop the cube at a safe landmark and let another player carry it; the small XP reward for depositing is not worth the elimination risk.
A second situation where skipping is the right call is when the active spawn is inside a building that another squad has already looted. The cube is a side objective, and engaging a squad over a side objective is one of the most consistent ways to lose a match that you would otherwise have won by playing the storm. Treat the cube as a bonus, not a target.
Where to find every chaos altar
Chaos altars are static structures marked on the map with a violet symbol. There are exactly seven altars in chapter 6 season 4, one per region. The list below tells you where to find each one so you can plan the cash-in step of your route as carefully as the pickup step.
- Northern altar: at the top of the Shattered Spire outpost, on the rebuilt observation deck.
- Central altar: inside the Broken Bridge watchtower, on the top floor next to the radio equipment.
- Eastern altar: at the silo row, in the loading area between the second and third silos.
- Southern altar: on the wooden platform attached to the old pump station, on the east side.
- Western altar: on the main loader platform, in the operator cab.
- Coastal altar: on the south crane bay, on the upper catwalk near the controls.
- Outskirts altar: in the parking lot of the roadside motel, under the small canopy.
Chaos cube locations in Fortnite change every season, and the current set in chapter 6 season 4 introduces a denser map of small glowing cubes that you can collect, transport, or cash in depending on the active modifiers. Because the islands of Fortnite are large and the cubes reset between matches, a clear mental model of where they tend to spawn saves more time than wandering from POI to POI. This guide walks through every confirmed cluster of chaos cube spawns in the live season, the routes that connect them safely, and the practical decisions you face when you pick up a cube during a match.
Because each region has a single altar, the practical question is rarely “is there an altar nearby?” and more often “is the altar safe to approach?”. Use the route risk column in the first table to set your expectations.
The altars also have a small visual tell that the in-game map does not show. After a deposit, the altar emits a thin column of violet smoke for about ten seconds. The smoke is visible from a longer range than the light beam on a cube, which means a player who is watching the map from a high point can sometimes tell which altars have just been used and which are still available. This is a small advantage, but in a tight match it can be the difference between a clean deposit and walking into a contested altar.
Decision rules for chaotic matches
Even with a perfect map of chaos cube locations in Fortnite, you still face moment-to-moment decisions. The rules below cover the situations that the community flags most often.
- If you hear the cube activation sound while you are gliding, redirect to the nearest cluster before you commit to a POI. The cube will still be there when you land.
- If you carry a cube and see another player, do not engage. The cube is a liability in a fight, and the elimination pulse is not worth the risk of losing your own health pool.
- If you are the last squad alive in a quadrant, do not pick up a second cube. The first one already secured the buff, and the second only adds risk.
- If the storm circle closes on your altar, deposit the cube before you rotate. The cube timer will expire during the rotation and you will lose the buff entirely.
- If the altar is contested, look for the chaos surge effect on the ground. Altars that have just been used leave a violet residue for about 30 seconds and cannot be used again in that window.
There is one more rule that the community has only settled on recently: if you are carrying a cube and you hear a second cube activation sound nearby, drop yours and rotate to the second cube. The reason is that the second cube is likely to be picked up by another player who is closer to their own altar, and your own cube is now a contested resource. Dropping and rotating trades a guaranteed deposit for a chance at a second deposit, which is the right call when the second cube is closer to an altar than your current cube is.
Common failure modes and how to avoid them
The most common reason players fail the chaos cube loop is not the spawn pattern but the management of the 90 second carry timer. The next most common reason is poor altar timing relative to the storm circle. The table below summarizes the failure modes and the corresponding fix.
| Failure mode | Symptom | Likely cause | Fix |
|---|---|---|---|
| Cube expires during rotation | You lose the cube and some health | Storm circle moved during the route | Deposit earlier, choose a closer altar, or skip the cube |
| Eliminated while carrying | Other squad gets a free buff and a pulse | You engaged without a clean escape | Drop the cube at a safe landmark if the route is contested |
| Altar already used | No buff on deposit | Another player deposited within the last 30 seconds | Switch to the next closest altar or wait for the residue to clear |
| No active cube in your region | You arrive at a cluster and find nothing | The active spawn rolled in another cluster | Rotate to the next cluster on the list, or skip the loop this match |
| Cube lands in deep water | You cannot interact with it | You died near the lake basin | Approach the central cluster only with a mobility item |
There is a sixth failure mode that does not show up in the table because it is rare: the cube lands on a moving platform, such as the floating platform in the central lake basin. When this happens, the cube is interactable, but it slides off the platform after about five seconds and falls into the water. A player who lands on the floating platform and finds no cube on the ground should check the platform itself before assuming the cluster is inactive, because the cube is sometimes still on the platform and simply not yet interactable.
How chaos cubes fit into the broader chapter 6 loop
Chaos cubes are one of three overlapping progression tracks in the current season. The other two are the standard XP curve from eliminations and placements, and the seasonal storyline quests that unlock the next chapter’s teaser. Chaos cubes contribute to the XP track through the small deposit reward, and they also unlock a separate “collector” banner that appears at the end of the match when you deposit at least three cubes in a session. The collector banner has no competitive value, but it is a useful personal goal for players who want a reason to engage with the chaos cube loop beyond a single match.
For studio leads reading this guide, the chaos cube loop is also a useful case study in how a small, repeatable objective can re-anchor a map that would otherwise be dominated by long rotations and third-party skirmishes. The cubes force the first two minutes of a match to be a contest over a small number of clearly defined resources, which gives every drop a real decision rather than a generic loot race. The same logic applies to the medallion system and the bounty system that have shipped in earlier seasons: a small, repeatable objective tied to a fixed landmark keeps the map from collapsing into a single high-traffic zone.
For competitive players, the chaos cube loop is best read as a tempo tool. A squad that deposits two cubes in the first two minutes is ahead on XP and buff economy, and that lead compounds over the next two minutes because the buffs make the second rotation safer and faster. The lead does not translate directly into placement, but it does translate into the small edges that decide placement in the late game.
Tracking changes between seasons
Because the spawn clusters change every season, the safest way to keep your route plan current is to check the patch notes on the day a new season goes live. The patch notes list the new cluster positions, the new altar positions, and any change to the deposit reward. The community tracker mirrors the same data within a few hours, and the tracker also keeps a historical log that is useful for spotting patterns across seasons.
A common mistake is to assume that the spawn rules from the previous season still apply. The 250 meter spacing rule, the one-cluster-per-region rule, and the POI rule have all held steady through chapter 6, but the exact landmarks and the exact altar positions change every season. A route plan that worked in the previous season will usually fail in the first match of a new season because the landmark the player was looking for has been renamed, moved, or replaced with a new POI.
Frequently asked questions
How many chaos cube spawns are there in a single match?
The current season activates between 6 and 8 chaos cube spawns per match, drawn from the 14 confirmed clusters listed in this guide. The exact active set rotates match to match, so you should not expect to find a cube at every cluster on the map.
Do chaos cube locations in Fortnite change every season?
Yes, the chaos cube spawn clusters change when the chapter or the season changes. The chapter 6 season 4 map is the active set as of this writing, and it will be replaced when Epic rotates the season. The general rule of one cluster per region and no two active clusters within 250 meters of each other tends to carry over from season to season.
Can you carry more than one chaos cube at a time?
No, the current season limits you to one chaos cube at a time. Picking up a second cube while you already hold one will drop the first one on the ground and reset the carry timer, so most players treat the second pickup as wasted effort.
What happens if the storm catches you while you carry a chaos cube?
The cube timer accelerates when you take storm damage, and the cube will expire if the storm catches you before you reach an altar. The cube also damages you when it expires, so the practical answer is to drop the cube at a safe landmark before you cross the storm circle and continue your rotation without it.
Are chaos altars always safe to use?
No. Each altar has a 30 second residue cooldown after a player deposits a cube, and a depositing player is briefly locked into the deposit animation, which makes them a soft target. Always scout the altar from a distance before you commit to the cash-in step.
Do chaos cubes give a competitive advantage in tournaments?
The buff from a single deposit is small and does not change the outcome of a fight on its own, but the elimination pulse from a shattered cube can swing a contested rotation. In high-stakes tournaments, squads sometimes assign one player to act as a “cube bait” who carries a cube into a contested zone on purpose, then lets themselves be eliminated to trigger the pulse. The tactic is risky and is only worth it in the late game when the storm circle is small.
Where is the safest chaos cube to collect in solo queue?
The two outskirts clusters at the roadside motel and the gas station are the safest in solo queue, because they are far from the typical storm circle and rarely attract more than one squad. The eastern farmland clusters are a close second and have the advantage of being close to a quiet altar.
Can you use a chaos cube to block a door or trap a player?
No, chaos cubes cannot be placed as a deployable object. You can only hold them in your inventory slot and deposit them at an altar. The cubes do not interact with the building or trap systems, so they are not a defensive tool.
How long does the chaos cube buff last?
The buff from a deposited cube lasts for the rest of the match, with two small exceptions. The overshield pulse expires after 60 seconds if you do not take damage, and the movement speed burst expires after 30 seconds regardless of damage. The XP payout and the collector banner credit are permanent for that match.
What is the best time to start the chaos cube loop in a match?
Start the loop as soon as you land, ideally within the first 30 seconds of the bus drop. The earlier you deposit, the more time you have to rotate to a strong position before the first storm circle closes, and the less likely you are to run into another player who is also running the loop.
Do chaos cubes respawn in the same match?
No, once a cluster is cleared it stays empty for the rest of the match. The respawn timer only applies between matches, so you cannot farm a single cluster multiple times in one session. Plan your route to use the cleared cluster as a landmark for the rotation, not as a second pickup point.
Does the chaos cube loop change in team rumble or other modes?
Team rumble and the limited-time modes often disable the chaos cube loop entirely because the modes are designed for respawn-based combat rather than resource loops. When the loop is active in a non-BR mode, the cube counts as a score event rather than a buff, and the altar deposits feed the team score rather than a personal XP track.
Where can I see the active chaos cube spawns in real time?
There is no official minimap indicator for chaos cubes in the live build. The light beam at the spawn is the only in-game signal, and it is visible from about 200 meters away. The community-run trackers list the historical spawn distribution but cannot predict the active set in the next match.
What should I do if I cannot find an active chaos cube in my drop zone?
If your initial drop zone has no active cube, rotate to the next closest cluster on the list and check the light beam before you commit to the landing. The 14-cluster distribution means the next cluster is rarely more than 400 meters away, so the rotation is usually short enough to stay ahead of the first storm circle.
Are chaos cubes worth the risk for players who care only about wins?
For a win-focused player, the chaos cube loop is a small, repeatable source of XP and a minor buff, and the risk of carrying a cube through the mid game is usually not worth the reward. The exception is the late game, when the buff can offset the damage from a contested rotation. Treat the loop as a side objective, not a primary win condition.





Leave a Reply