
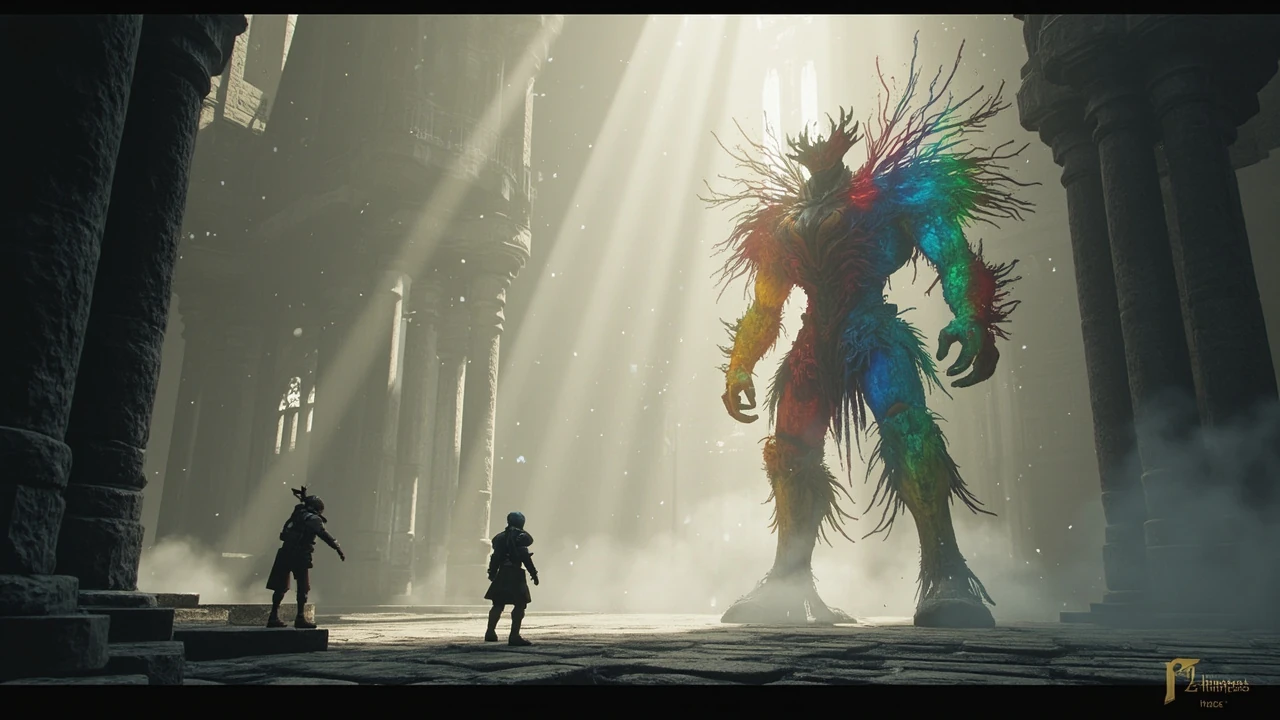
Chromatic Ramasseur: what the encounter is and how to approach it
The Chromatic Ramasseur is one of the named boss fights in Clair Obscur Expedition 33, the French turn-based RPG from Sandfall Interactive. The fight is designed around color shifts that change the boss’s damage profile, so a successful run depends as much on reading the chromatic telegraph as on raw damage output. This guide walks through how the encounter is structured, what a typical action order looks like, where players commonly get stuck, and how to tune a party for a clean first clear.
Before any deep dive, it helps to keep one thing in mind: the Chromatic Ramasseur rewards preparation. It is not a damage race, and it is not a pure reaction check. The mechanic is visible and learnable, and a team that has reached the encounter with a balanced damage mix and a working AP economy will usually get through it within two or three attempts.
Encounter overview: who the Chromatic Ramasseur is
The Chromatic Ramasseur is a mid-late act boss that mixes melee pressure with painted elemental phases. Each phase recolors the boss and changes the type of damage it deals and resists. The encounter is fought as a standard turn-based duel: a single party on one side, the boss on the other, with action points, break values, and status effects following the same rules as the rest of the game.
From a design standpoint, the boss is meant to test three things the game has been teaching for several hours:
- Reading a visible damage-type cue before committing to an attack.
- Spending action points across the whole party instead of dumping them on a single carry.
- Switching damage profiles between phases rather than relying on one elemental setup.
That last point is the core of the fight. The Chromatic Ramasseur rewards players who treat it as a sequence of short phases rather than one long health bar.
Action order and turn structure
The fight follows the standard Clair Obscur Expedition 33 turn rules. Each side fills a shared timeline, and characters with higher speed act more often. The Chromatic Ramasseur has a relatively slow base speed, so a typical party will get two actions for every one of the boss’s, unless a phase swap grants the boss a turn-1 buff.
A reliable turn order for a first clear looks like this:
- Open with a defensive support skill if any party member starts below 70 percent health.
- Apply a break on the boss using a skill that matches the current chromatic phase.
- Layer one or two elemental burst skills while the break window is active.
- Pass turn to the boss, watch the color telegraph, and re-evaluate element choice.
Where teams go wrong is by trying to skip step 1. The Chromatic Ramasseur hits hard enough that a single unmitigated late-phase attack can drop a squishy damage dealer from full to zero, which forces a long recovery and breaks the action economy.
Phase 1: the red Ramasseur
The first phase is the red Ramasseur. The boss is built around physical strikes and a single forward cleave that hits a small arc. Damage in this phase is mostly physical, so shields and damage reduction skills that scale with defense are very effective.
A practical plan for the opening turns is:
- Set the tank or frontline character to guard on turn 1 if they have a taunt or guard skill.
- Use a wind or physical-break skill on turn 1 or 2 to open the break window.
- Save the strongest single-target burst for the break, not for raw neutral turns.
The red Ramasseur’s most dangerous move is a telegraphed double swing that hits the entire frontline. It is fully readable. The wind-up lasts about one and a half seconds, and a guarded character will absorb most of the damage if the guard is timed correctly. Free members can study a video of the move on third-party walkthrough sites such as the Game8 Chromatic Ramasseur page if they need the visual cue.
Phase 2: the blue Ramasseur
When the boss shifts to blue, the damage type changes from physical to ice. The red moves are replaced by a slow, ranged cold strike and a stacking frost debuff. Characters who relied on physical defense now have to lean on elemental resistance gear or a heal-over-time skill.
This is the phase that punishes single-element teams. A party that built exclusively for wind or physical damage in act 2 will start seeing the blue Ramasseur shrug off their skills. The practical answer is to keep at least one fire and one lightning character in reserve, even if the active lineup has been mono-element for most of the run.
Two specific points worth knowing:
- The blue Ramasseur’s ranged attack pierces guard, so a defensive skill that works in phase 1 may not absorb the same attack here.
- The frost debuff stacks to a maximum of three. At three stacks, the affected character takes bonus ice damage and loses one action point on their next turn. Cleanse skills become worth more than raw healing in this window.
Phase 3: the golden Ramasseur
The third and final phase turns the boss golden. Damage output jumps, but the boss also takes more damage from every element. The encounter stops being a puzzle and starts being a damage race, except the puzzle does not actually go away: the golden Ramasseur still uses the same elemental profile it had in phase 2, so any cleanse or resistance setup that was working on blue continues to work here.
The cleanest finish is to enter phase 3 with a break already loaded, fire the strongest elemental burst skill on the first turn, then chain a second burst on the second turn before the boss can reset. Teams that try to save a powerful ult for the absolute last 10 percent of the boss’s health bar usually find that the boss acts first and wipes the carry.
Defensive timing and AP economy
Action points are the hidden layer of the fight. Each character has a small pool of AP per encounter, and the most expensive skills can only be cast a few times. The Chromatic Ramasseur is built to drain that pool if the team overcommits.
A simple AP budget that holds up across phases:
| Party role | AP to spend per phase | Skill type to prioritize |
|---|---|---|
| Frontline / tank | 2-3 | Guard, taunt, single-target break |
| Elemental damage | 4-5 | Elemental burst, secondary element skill |
| Support / healer | 2-3 | Cleanse, heal-over-time, one shield |
The exact numbers change with party level, but the shape is the same. A tank that spends all its AP on offense is a tank that dies in phase 2. A healer that only ever casts single-target heals runs dry on the golden Ramasseur’s last stand.
Common failure modes
Most first clears that fail do so for one of four reasons. Pinning the reason down early usually saves an entire attempt.
| Symptom | Likely cause | What to change |
|---|---|---|
| Carry drops to zero in one hit during phase 2 | No elemental resistance gear equipped | Swap in a piece with ice resist or use a shield skill |
| Boss health stalls in phase 3 | Element does not match the chromatic profile | Recheck the color before committing bursts |
| Party runs out of AP before the kill | Too many expensive skills cast on neutral turns | Hold bursts for break windows, use basic attacks otherwise |
| Healer keeps dying to the red cleave | Healer positioned in the front arc | Reposition the healer or use a taunt from the tank |
Each of these failures is recoverable in a single attempt if the team is willing to spend the first turn of the next phase diagnosing instead of attacking.
Party composition recommendations
Clair Obscur Expedition 33 does not lock the player into one party, so the most useful advice is structural rather than a single named build. A team that clears the Chromatic Ramasseur comfortably tends to look like this:
- One tank or guard character with at least one physical and one elemental defensive skill.
- One elemental damage dealer whose main element is the weakness the boss shows on phase 1 entry.
- One secondary elemental damage dealer whose element covers the second phase’s profile.
- One healer or support character with at least one cleanse and one heal-over-time.
Players who are still leveling can usually swap the support character for a second damage dealer as long as the team carries at least one cleanse consumable item. The encounter is harder that way, but it is not unwinnable.
Pre-fight preparation checklist
The five-minute setup before the fight is often the difference between a one-shot and a five-attempt grind. A short checklist that holds up across most party levels:
- Re-equip elemental resistance accessories to match the current act’s threats.
- Confirm that the healer has at least one cleanse skill equipped, not just a raw heal.
- Reassign any leftover skill points so the carry has a mix of single-target and AoE skills.
- Check that the party has at least one item that removes frost or burn debuffs.
- Save the strongest single-target burst for the phase 3 break window rather than spending it on the opener.
None of these steps are exotic. They are the same preparations that the rest of the game has been rewarding since the first boss, and the Chromatic Ramasseur is the first fight where skipping them becomes genuinely expensive in attempt count.
How the Chromatic Ramasseur compares to other act bosses
Within the same act, the Chromatic Ramasseur sits in a middle band of difficulty. It is more demanding than the standard elite encounters because the elemental swap forces a real party adjustment, but it is less brutal than the act’s true wall boss, which usually combines the chromatic mechanic with a multi-target phase.
| Aspect | Standard elite | Chromatic Ramasseur | Act wall boss |
|---|---|---|---|
| Phases | 1 | 3 | 3-4 |
| Elemental change | No | Yes, mid-fight | Yes, layered with add spawns |
| Damage type | Single | Switches with phase | Switches with phase and add |
| Recommended attempts | 1-2 | 2-4 | 4-8 |
Read that table as a calibration aid, not a promise. Players with deep action-RPG experience will clear the Chromatic Ramasseur on the first attempt, and players new to turn-based combat may need five or six. The internal design of the fight is consistent across runs.
Post-fight rewards and what to do next
Clearing the Chromatic Ramasseur unlocks the next section of the act and rewards a piece of equipment that scales with elemental damage. The drop is worth equipping on the main carry, even if it is not the best-in-slot piece for the rest of the run, because the next act’s enemies are heavier on elemental resistance and the boss’s stat curve is tuned around the same idea.
The usual next steps after a clean clear are:
- Save at the nearby checkpoint and re-equip the new reward.
- Return to the last camp to restock cleanse consumables.
- Check any optional side objectives that were skipped on the way to the boss, since the difficulty curve tends to flatten right after a major encounter.
When to ask for help or look up a video
There is no shame in checking a written walkthrough or a video guide on a fight that is built around a visible mechanic. The Game8 Chromatic Ramasseur page, for example, exists specifically to show the color telegraph in motion, which can be much easier to read on a video than in a text description. Players who know they tend to learn from visual cues will save themselves an hour by watching a single clip before the first attempt, rather than failing three or four times and then watching the same clip anyway.
For readers who prefer reading, the key cue is simple: red means physical, blue means ice, gold means “use whatever you used in blue, but faster.” If a player can recognize those three states, the fight becomes a clean test of execution rather than a knowledge check.
Frequently asked questions
What level should the party be for the Chromatic Ramasseur?
The boss is tuned for the upper part of the act’s level range, but Clair Obscur Expedition 33 is forgiving about a level or two either way. A party that is slightly under-leveled can still win with a balanced element setup and good break timing. A party that is several levels under will feel the damage spike in phase 3 regardless of strategy.
Does the Chromatic Ramasseur change weakness every playthrough?
No. The phase order, color telegraph, and element mapping are fixed across runs. The fight has a small randomization in which skills the boss uses in which turn, but the underlying phase structure is identical. That is why a written strategy holds up: the mechanic is the same, only the execution window moves slightly.
Is the fight easier with a full fire party?
A mono-fire team is very strong in phase 1 and phase 3, because the boss does not shift to fire in any phase. It is significantly weaker in phase 2, where the blue Ramasseur takes reduced fire damage and stacks frost on the party. A mixed team is the recommended setup, even if the carry is a fire user.
Can the Chromatic Ramasseur be stunlocked?
Short break windows are possible, and the game rewards chaining burst skills inside those windows, but the boss is resistant to repeated stuns. Once a break wears off, the boss is back to its normal speed. Players who try to chain stuns back to back will see diminishing returns by the second attempt.
What is the best skill to open the fight with?
A guard or a defensive buff is the strongest opener for the first turn, because it absorbs the red Ramasseur’s opening cleave and gives the rest of the party a free turn. Players who open with an elemental burst will often see the boss act first and force a heal on turn 2, which spends the AP the party was trying to save for the break window.
Does the Chromatic Ramasseur drop a unique weapon or armor?
Yes. The boss drops an elemental scaling piece of equipment, and the exact stats are tuned to the same element the party was leaning on during the fight. It is not always the best-in-slot item, but it is worth equipping immediately because the next act’s enemies and bosses are tuned around the same scaling.
Is the Chromatic Ramasseur a required story boss?
It sits on the main story path for the act, so most players will encounter it as part of a normal run. The encounter is also accessible from a side branch for players who are exploring the map out of order, and the strategy is the same in either case.
What is the easiest way to learn the chromatic telegraph?
Watching a short clip of the fight is the fastest way, because the color change is highly visible on screen. The Game8 walkthrough page is a good reference for the visual cue, and reading the official in-game bestiary entry can help players who want to confirm the exact elemental profile before the first attempt.
Can the fight be skipped or cheesed with stealth?
No. The Chromatic Ramasseur is a required boss encounter on the main path, and there is no stealth or environmental shortcut to bypass it. The fight is the gate to the next section of the act, so the only real option is to clear it normally.
What is the most common reason for wiping on the first attempt?
Most first-attempt wipes come from the healer getting clipped by the red cleave, or from the carry spending too much AP on the opener. Both are easy to fix in the second attempt: reposition the healer and hold a burst for the break. Most parties that adjust those two things clear the fight on attempt two.




Leave a Reply