
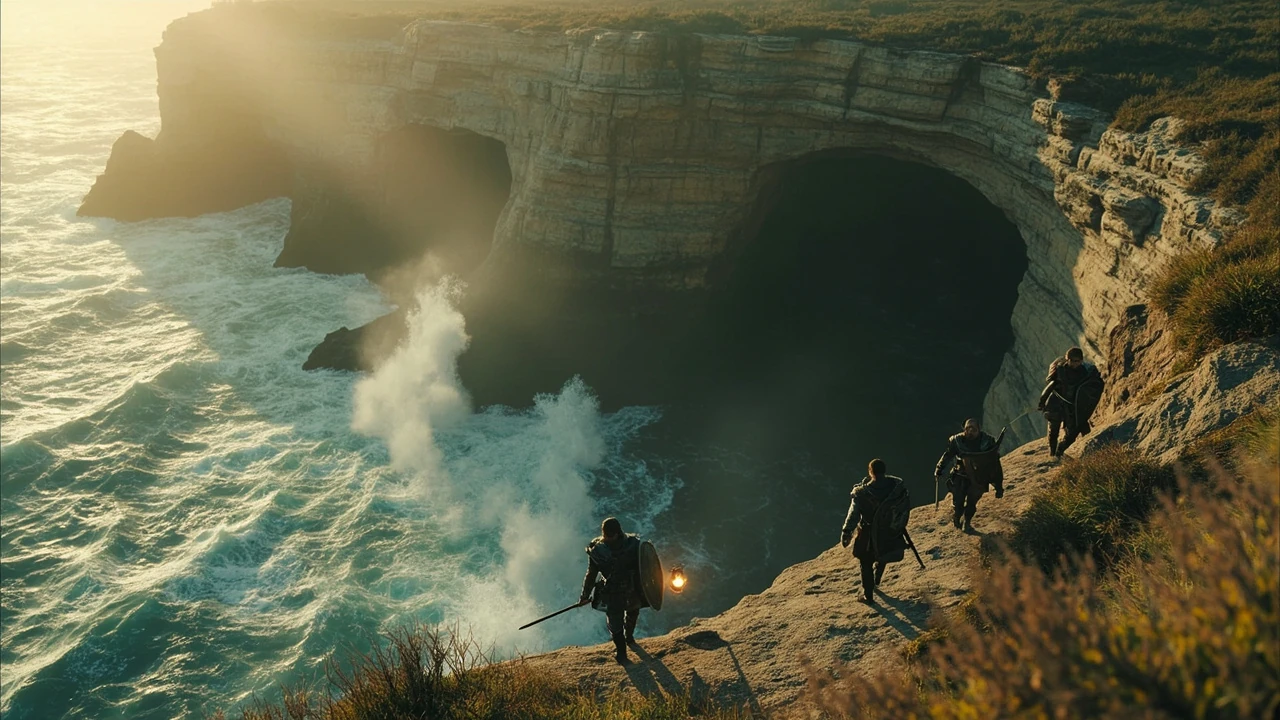
Coastal Cave Expedition 33: how to reach the cave and beat Cruler and Bruler
The Coastal Cave sits on a peninsula east of Monoco’s Station in Clair Obscur: Expedition 33, and the only reason most players look it up is the same: it is the first place that punishes you for spamming basic attacks instead of learning parry timing. The cave itself is short, but the fight inside gates the weapons that Cruler and Bruler sell, and several of those weapons stay relevant into the late game, so skipping the cave has a real opportunity cost rather than a cosmetic one. This guide walks through where the cave is, what you need to reach it, how the two Nevron blacksmiths actually attack, and how to plan the parries so the fight does not snowball out of control.
Before reading further, be aware that the Coastal Cave is an optional area. The guide assumes you have already reached Act 2 of the main story, that Esquie’s swimming ability is unlocked, and that your party can sustain a multi-minute fight against two enemies that hit hard but telegraph cleanly. If any of those are not true, the right move is to push the main story forward first and come back when Esquie is available, because the cave does not close behind you.
What the Coastal Cave actually is
The Coastal Cave is an optional, self-contained area in Clair Obscur: Expedition 33, distinct from the explorable Continent surface and the linear dungeons. It contains exactly one combat encounter, a small walk-in shop, and nothing else, so the entire visit is structured around that single fight. Because the area has no side puzzles, no hidden NPCs, and no second arena, players who get stuck tend to get stuck on the boss, not on the journey in.
The encounter against Cruler and Bruler is a two-on-one fight against Nevron blacksmiths, the same enemy archetype you can find in other parts of the Continent. Mechanically, the fight is a parry tutorial disguised as a boss: both enemies have few attacks, those attacks repeat, and the rewards are tied directly to performance rather than to exploration. Once the fight is over, the same room opens as the Nevron weapon shop Cruler and Bruler run, so the cave is also a vendor unlock.
Where the cave is on the Continent map
The Coastal Cave is on a peninsula east of Monoco’s Station, which acts as the central hub for much of the Continent’s travel. On the world map, Monoco’s Station sits in the central region, and the peninsula extends east into the sea. The cave entrance faces the water, so it is easy to spot once you pan the camera over the coastline, and it is the only major landmark on that peninsula once Esquie’s swimming ability is available.
You cannot simply walk in from the station. Esquie’s swimming ability is required, and you only get that ability during the main story, which is why players who try to find the cave early end up bouncing off an invisible boundary. The sequence is straightforward: reach the Act 2 trigger in the main story, progress until Esquie learns to swim, then return to the Continent map and head to the peninsula east of Monoco’s Station.
Prerequisites before you go
The Coastal Cave has a deliberately low prerequisite count, but each prerequisite is hard. Confirm all of the following before you invest the travel time.
- Act 2 of the main story must be reached. The cave is gated behind the same story beat that unlocks Esquie’s swim.
- Esquie’s swimming ability must be active. You will need Esquie in the active party to cross the water from the station area to the peninsula.
- Your party should be at a level appropriate for the current Act 2 encounters. Cruler and Bruler hit hard enough that a one-level deficit turns the parry window into a coin flip.
- At least one party member should have a reliable healing or damage-mitigation option. The fight is long by design, and raw damage output is not the win condition.
There is no key item, no hidden quest flag, and no time-of-day requirement. If the game lets you swim to the peninsula, the cave entrance will be open.
How to navigate to the cave entrance
From Monoco’s Station, take the eastern exit that leads toward the sea. Esquie will move into the water automatically once the swim ability is unlocked, and the route to the peninsula is a short curve along the coast. The cave entrance sits low on the cliff, partly hidden by the rock face, so the first attempt usually ends with the player walking past it and panning the camera back.
Once inside, the cave is linear. There is a single short corridor that opens into a circular room. Cruler and Bruler are present from the moment the encounter loads, and they do not start the fight until you interact with Cruler. That means you can position your party, open the menu, and review your equipment before triggering combat, which is a small but useful detail that most players miss on a first visit.
Triggering the fight with Cruler and Bruler
The two blacksmiths are flagged as friendly on first sight, which is part of the design. Approach Cruler, the smaller of the two, and use the dialogue option that asks about their work. The fight starts immediately after the dialogue closes, with no cutscene and no opportunity to re-equip, so finalize your setup before the conversation.
If you attack either blacksmith without speaking to Cruler first, the encounter still triggers, but you skip the scripted lead-in and the boss bar appears instantly. There is no reward or penalty difference, but speaking to Cruler is the intended path because it also unlocks the shop on victory without a second prompt.
The two enemies and what they actually do
Cruler and Bruler are a coordinated pair rather than two independent fighters. Cruler focuses on shielding and a repetitive four-swing attack, Bruler carries a large blacksmith hammer and uses slower but harder-hitting combos. The fight is balanced so that ignoring either one of them for too long lets the other one ramp up, which is why the encounter is a parry test rather than a damage race.
The combined health pool is large by the standard of an optional Act 2 encounter, so a pure damage strategy runs out of healing before the bar empties. Parry, jump, and patience are the three resources you need to manage.
Cruler’s attack pattern in detail
Cruler’s role in the pair is to keep you honest on rhythm. Most turns, Cruler will shield its ally and perform a four-swing combo on the player. The combo is identical each time, with no change-ups, no charge telegraphs, and no environmental variant, so the parry window is learnable within two or three repetitions.
The practical advice is to ignore the shield and focus on the swing timing. The shield affects the second blacksmith, not your parry, and trying to break it before attacking is a common early mistake. Once the rhythm is set, Cruler’s turn is a metronome that you can read while you position for Bruler’s slower attacks.
Bruler’s attack pattern in detail
Bruler is the heavier threat. Its signature move is a slow five-hit combo with the blacksmith hammer, and the last hit is slower than the first four. That final hit stuns the target and prevents them from acting on the following turn, which is the main way the fight snowballs when players fall behind. A clean parry on the last hit keeps your action economy intact; a clean hit on it can cost you two turns.
Bruler also leaps into the air and slams the hammer down, and the dodge for that move is a jump rather than a sidestep. The visual cue is a symbol that appears beneath the target the moment Bruler leaves the ground, so the cue is forgiving for players who learn to watch the floor instead of the enemy. Jumping on a normal sidestep, or sidestepping on a jump, will still connect, so the move is a small but real punish for sloppy reactions.
Parry windows you can actually rely on
Parry timing in Clair Obscur: Expedition 33 follows the same broad rules as the rest of the game: a parry is a timed block just before impact, not a generic block. The Coastal Cave fight is the cleanest place to learn that timing because the attack patterns are short, repeating, and clearly telegraphed, which is why the cave is often recommended as a parry practice room even by players who already beat it.
- Cruler’s four-swing combo uses an even rhythm on the first three hits and a slightly longer gap before the fourth. Train on the first three, then add the fourth once the first three are consistent.
- Bruler’s five-hit combo has four even hits and a clearly slower final hit. The final hit is the one that stuns, so prioritize that parry and accept chip damage on the earlier four.
- Bruler’s ground slam is dodged by jumping, not by parrying. The floor symbol is your friend, and learning to read it takes the slam out of the rotation entirely.
- When both enemies are in the same phase, parry Cruler first because Bruler’s stun will not save you if Cruler is still swinging. Reverse the priority only if Bruler is one hit away from a turn.
Recommended party composition for the fight
Because the fight is long and the parries are the win condition, composition matters less than in a damage-race boss. A balanced Act 2 party with a dedicated healer or a hybrid damage-healer, a parry-friendly front liner, and a damage dealer with good turn economy is enough. The two enemies do not have a phase where the damage dealer can burst, so bring consistency rather than glass cannons.
If your current party is built around a single carry, the cave is a good place to experiment with rotation rather than to grind levels. Cruler and Bruler punish tunnel vision more than they punish underlevel, so a flexible party clears the fight faster than a stacked one that depends on one character staying alive.
Healing and resource management
The combined health pool means you will be in the fight for several minutes, and the only way to keep your party healthy is to spend healing actions during the windows between combos rather than after you have already taken a stun. Treat the parry as a healing action, because a successful parry refunds health or AP in most Act 2 builds, and the fight becomes self-sustaining once the parries land.
Avoid the temptation to burn a healing item on the first Bruler slam. The slam is a jump, not a parry, so the correct response is free, and the healing item is better spent a few turns later when both enemies are still healthy and the heal matters more than the reaction.
Positioning and arena awareness
The fight arena is a circular stone room with a clear floor and no hazards. Positioning matters because Cruler’s shield blocks line-of-sight for some abilities, and Bruler’s slam telegraph needs an unobstructed jump path. Stay near the center of the room, on the side opposite the entrance, so that you have room to back up during Bruler’s slow combo without backing into a wall.
Do not chase Cruler to the back of the room. The shield follows Cruler, and chasing it drags the shield into your healer’s line, which is the most common way a comfortable run turns into a wipe. Pull back, hold center, and let Cruler come to you.
What to do if you wipe
Wiping to Cruler and Bruler is normal, and the game is forgiving about it. The encounter respawns at the cave entrance, and you can re-equip, change party members, and adjust your build before walking back in. There is no checkpoint inside the room, so a wipe costs you the walk from the entrance, not the entire dungeon.
If you wipe twice, the issue is usually a single decision, not the whole build. Common culprits include: trying to break Cruler’s shield before parrying, sidestepping the slam instead of jumping, healing too late to prevent a Bruler stun, or chasing Cruler into a corner. Fix one of those and the third attempt usually clears.
Underleveled? How to spend the time before the third attempt
If you walked into the cave underleveled, the most efficient use of time is to push the main story until Esquie’s swim is comfortable rather than grinding. The Act 2 main path has multiple encounters that reward exploration with the same experience curve as the optional cave, and the story beats often unlock new abilities that make the Cruler and Bruler fight noticeably easier.
You can also come back later. The cave does not close once the story moves on, and a fully kited Act 2 party with one or two extra weapon levels can clear the fight in a single parry-focused rotation without grinding specifically for the cave.
Cruler and Bruler’s shop, and what to buy first
Defeating Cruler and Bruler unlocks the same room as a weapon shop run by the two blacksmiths. The inventory is not a full armory: it is a curated list of weapons, including some the player may already own, and the prices are tuned for Act 2 progression rather than late-game farming. Plan your purchases before the fight, because the shop opens on victory and stays open until you leave the cave.
The right first purchase depends on your current loadout, but the broad rule is to buy the weapon that upgrades your parry timing the most, not the one that does the most damage. Parry-friendly weapons in Expedition 33 typically come with timing windows that are wider on a successful parry, and a wider window is worth more than raw stats in a fight that is already parry-gated.
| Shop category | What it covers | When to prioritize it |
|---|---|---|
| Parry-focused weapons | Wider parry windows, parry-related passives, higher parry damage | First purchase for most parties, because the cave itself is a parry test |
| Stamina or AP focused weapons | Larger resource pool, faster resource regen on parry | Second purchase if the fight felt like a resource problem rather than a timing problem |
| Raw damage weapons | Higher base attack, crit-oriented passives | Only if parry timing is already comfortable and the build depends on burst |
| Hybrid or weapon upgrades | Weapons the player may already own, returned as upgrades | Last priority, because the upgrade is a side benefit rather than a build enabler |
Why the Coastal Cave is recommended as a parry practice room
The cave is short, the encounter is fixed, and the attack patterns are short loops that the player can repeat without respawning in a different room. For players who want to internalize the parry rhythm before tackling harder Act 2 content, the Coastal Cave is a low-stakes environment in which to do that. The fight does not scale with level, so the experience is consistent across runs.
The practice value extends beyond this specific fight. Cruler’s four-swing loop and Bruler’s five-hit combo both show up as building blocks in later encounters, and players who learn to parry them in the cave tend to clear the next Act 2 boss with fewer wipes than players who skip the optional content.
Common mistakes that turn the fight into a coin flip
- Breaking Cruler’s shield first. The shield is not a damage gate, and breaking it costs turns you could have spent parrying.
- Sidestepping Bruler’s ground slam. The slam is a jump dodge, and the floor symbol is the cue, not the hammer itself.
- Healing after the stun. The stun is the resource you need to prevent, not recover from, so heal during the combo, not after the final hit lands.
- Chasing Cruler to the back of the room. Pull back to center, hold position, and let Cruler come to you.
- Skipping the parry tutorial phase of the fight. Both enemies have clean telegraphs, and the parry is the win condition, not a damage optimization.
How the Coastal Cave fits into the wider Act 2 route
Act 2 opens up the Continent’s travel network, and the Coastal Cave is one of several optional side areas that branch off the main path. Because the cave is east of Monoco’s Station, it pairs naturally with the eastern exploration loop rather than the western one, so a clean Act 2 route tends to hit the cave once Esquie’s swim is unlocked and before the player commits to the late Act 2 dungeons.
Players who skip the cave in Act 2 often return in Act 3, and the encounter still works as a parry refresher at that point. The rewards, however, scale differently, so the optimal visit is the first one, when the shop inventory is tuned to the player’s current progression rather than their current level.
What changes once the cave is cleared
Clearing the cave unlocks the shop permanently for the rest of the playthrough, so the player can return to buy new weapons as they appear in the shop rotation. The encounter itself does not respawn in a meaningful way, so the cave is not a repeatable boss farm, but the vendor unlock is the durable reward.
The other durable change is the player’s own parry timing. Players who learn the four-swing and five-hit loops in the cave tend to carry that timing into the rest of Act 2, and the rest of Act 2 is where parry-friendly builds start to outscale raw damage builds, so the cave is also a build-enabling side area rather than a pure loot stop.
When to skip the Coastal Cave
The cave is not mandatory, and there are a few cases where skipping it is the right call. If you are in the middle of a main story boss and resources are tight, the cave can wait. If your current party is heavily specialized around a single carry who cannot parry, the cave will not suddenly teach that carry the timing, and the experience curve is better spent in main story content that is tuned to your build.
There is also no penalty for visiting the cave late. The shop inventory, the encounter, and the parry practice value are all stable, so the right time to go is whenever your party has Esquie’s swim, a healer, and ten free minutes to learn the two attack loops.
Quick reference: encounter at a glance
| Element | Detail |
|---|---|
| Area type | Optional, single-room cave |
| Enemies | Cruler and Bruler (Nevron blacksmiths) |
| Trigger | Speak to Cruler and ask about their work |
| Key mechanic | Parry Cruler’s four-swing combo and Bruler’s five-hit combo, jump Bruler’s ground slam |
| Main risk | Bruler’s final hit stuns and skips a turn |
| Reward | Cruler and Bruler’s weapon shop, parry-friendly weapons, parry timing practice |
| Prerequisites | Act 2, Esquie’s swimming ability unlocked |
| Respawn behavior | Encounter respawns at the cave entrance, shop persists |
Build and equipment considerations
Because the fight is parry-gated, equipment that widens the parry window is more valuable than equipment that adds raw damage. Weapons with parry-related passives, armor with parry timing modifiers, and accessories that refund resources on a successful parry are the build pieces that matter most. Raw damage pieces are fine, but they do not change the win condition.
Players who already run a parry-focused build will clear the fight faster than the encounter’s level suggests, because their parry windows are wider than a generic build’s. Players who run a damage-focused build should expect to clear the fight more slowly, with more chip damage, and with more healing actions than a parry build would need.
How the cave compares to other Act 2 optional content
Compared to other Act 2 optional areas, the Coastal Cave is short, scripted, and parry-heavy. Other Act 2 optional areas lean on puzzles, exploration, or longer boss fights, so the cave is the right choice for a player who wants a clean parry test without committing to a longer optional chain.
The cave also pairs well with the eastern exploration loop because the same swim ability that opens the cave opens several other eastern landmarks. Players who want a focused Act 2 session can hit the cave, the eastern landmarks, and the late Act 2 dungeons in a single loop without backtracking to Monoco’s Station.
External references and further reading
For a second view of the encounter layout and the parry timings, the IGN wiki page for the Coastal Cave is a useful cross-check, and the underlying combat system is documented in the Wikipedia article on Clair Obscur: Expedition 33, which covers the broader turn-based structure of the game. Both pages are worth bookmarking if you plan to return to the cave later for parry practice or to check the shop rotation.
Frequently asked questions
Where is the Coastal Cave in Expedition 33?
The Coastal Cave is on a peninsula east of Monoco’s Station, in the central area of the Continent map. You need Esquie’s swimming ability to reach the peninsula, and the cave entrance faces the water. Once Esquie can swim, the route is a short curve along the coast from the station.
Do I need to finish Act 2 to enter the Coastal Cave?
You do not need to finish Act 2, but you do need to reach it and unlock Esquie’s swimming ability. The cave is gated behind the same story beat that unlocks Esquie’s swim, so any party that can reach the peninsula and walk into the cave entrance can attempt the encounter.
How do I start the Cruler and Bruler fight?
Speak to Cruler, the smaller of the two blacksmiths, and choose the dialogue option that asks about their work. The encounter starts immediately after the dialogue closes. You can also attack either blacksmith directly, which triggers the fight without the scripted lead-in but does not change the rewards.
What is the parry timing for Cruler’s four-swing combo?
Cruler’s combo uses an even rhythm on the first three hits and a slightly longer gap before the fourth. The first three hits are the best place to learn the timing, and the fourth hit is the one to add once the first three are consistent. There are no change-ups in the combo, so the rhythm is learnable in a few repetitions.
What is the parry timing for Bruler’s five-hit combo?
Bruler’s combo has four even hits and a clearly slower final hit. The final hit is the one that stuns, so that is the parry to prioritize. Chip damage on the first four hits is acceptable if it keeps the final parry clean, because the stun is the resource the fight punishes you for.
How do I dodge Bruler’s ground slam?
The ground slam is a jump dodge, not a parry and not a sidestep. Bruler leaps into the air and slams the hammer down, and a symbol appears beneath the target the moment Bruler leaves the ground. Jump on the symbol, not on the hammer, and the slam is easy damage avoided.
What does the Coastal Cave shop sell?
Cruler and Bruler’s shop sells a curated set of weapons, including some the player may already own, and the inventory is tuned for Act 2 progression. The best first purchase for most parties is a parry-focused weapon, because the wider parry window is worth more than raw damage in a parry-gated fight.
Can I return to the Coastal Cave after beating it?
Yes. The encounter respawns at the cave entrance, so the player can come back to practice parry timing or to replay the fight. The shop also persists, and the inventory rotates as the story progresses, so the cave remains a useful stop throughout Act 2 and into Act 3.
Is the Coastal Cave worth doing on a first playthrough?
Yes, for two reasons. First, the parry practice transfers to later Act 2 encounters, so the time spent in the cave pays off outside the cave itself. Second, the shop inventory is tuned to the player’s current progression, so the rewards are most useful on the first visit rather than on a return trip.
What level should my party be for the Coastal Cave?
There is no hard level requirement, but a party that can sustain a multi-minute fight against two enemies that hit hard but telegraph cleanly is enough. If your party is one or two levels below the current Act 2 curve, the fight is still winnable through parry discipline, and a wipe costs only the walk from the entrance rather than a checkpoint.




Leave a Reply