
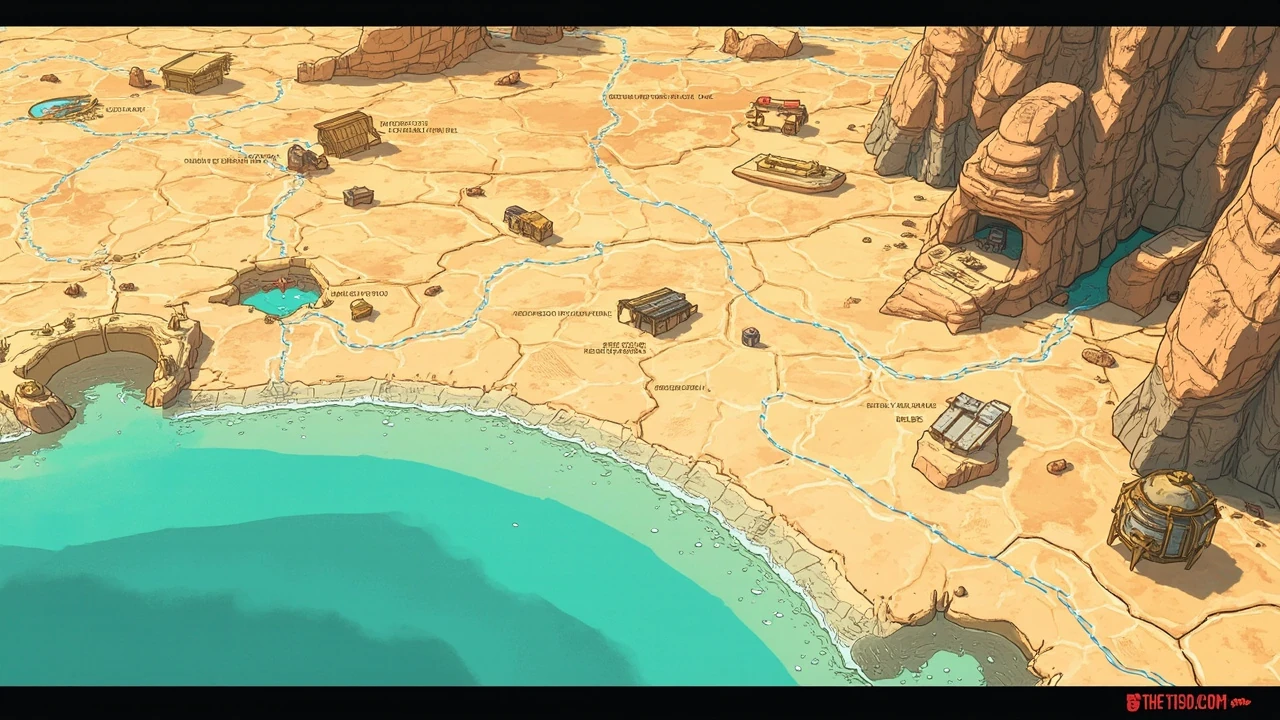
Coastal Bonescape collectibles: how the route actually holds together
The Coastal Bonescape sits on the western edge of the Borderlands 4 map, and it behaves like a small sub-region with a tight dependency graph. Every collectible here is reachable on foot if you sequence your traversal tool unlocks in the right order, and a clean sweep through the coastal bonescape collectibles list is less about raw count than about which landmarks you clear first. Several log pickups sit behind the Order Silo’s balloon, and a few of the unmarked finds only make sense once you already know the local geography. Treating the region as a graph rather than a checklist is the difference between a 20-minute sweep and a frustrating hour of backtracking across salt flats.
This walkthrough treats the route the way a level designer would. Each section names the landmark, the unlock it depends on, and the kind of pickup you are actually walking toward, so you can plan a clean pass instead of bouncing between the same two cliff edges for the rest of the evening.
What is in the coastal bonescape collectibles set
The pickup roster is a small, well-defined mix rather than a long list of generic loot. The verified guide describes four core collectible types in the Coastal Bonescape: Vault Fragments, ECHO Logs, Evocariums, and a small number of unmarked items such as Marcus Bobbleheads. Each category is grounded in the world rather than tacked on as filler.
ECHO Logs are audio diaries you physically walk to, usually with a title that hints at the local story. Evocariums tie into creature lore and tend to sit near fauna or unusual environmental cues. Vault Fragments are a quest-driven currency that the game tracks separately, and Bobbleheads are collectible fan items that do not show on the compass at all. The mix matters because each type rewards a different sweep style: logs reward careful edge walking, Evocariums reward slow approach speed near water, and Bobbleheads reward a willingness to check every pier, lean-to, and crate stack the main path barely touches.
If you have played earlier Borderlands titles, the design pattern is familiar at a glance: each region layers a small number of high-priority quest items on top of a denser set of cosmetic or lore pickups. The difference in Borderlands 4 is that several of those pickups are gated by traversal tools rather than by level or story progress, which is why the Order Silo balloon is the single most important unlock for this region.
Traversal dependencies you need to understand before you start
Walking the coast from west to east is the easy part. Reaching the trickier pickups requires two things: a working grasp of the region map edges, and at least one Order Silo completion. The verified guide calls this out directly, noting that the best way to reach one of the region’s ECHO Logs is to complete the Coastal Bonescape Order Silo, because you need the balloon to reach a cliff east of that silo and north of a local shack.
For developers and technical players used to thinking in systems terms, treat each Order Silo as a binary capability unlock that swaps into the player’s traversal graph. The balloon is a vertical-reach primitive; once it is in the player’s toolkit, every cliff pickup that previously read as too high becomes a simple side-trip from a known landmark. Plan your sweep around that primitive rather than around a geographic walk, because the moment you unlock the balloon the route shape changes.
Capability unlocks tied to Order Silos
- Balloon: vertical lift to cliffside lean-tos, ridges, and high cave overhangs. Required for the ECHO Log east of The Stockroom Order Silo.
- Grapple or equivalent: useful for crossing the flipped-canoe stretch near the southwest corner, where coast-following is faster than inland detours.
- Order Silo fast-travel: once any Order Silo is online, you can re-enter the region and skip the long approach from neighboring zones.
If you are starting the region cold, expect to pick up one or two early pickups on foot, then bounce out to clear the Order Silo, then return with the balloon in hand. The route is much shorter on the second pass, and the second pass is where most players actually finish the coastal bonescape collectibles list.
Region edges and the landmarks that anchor them
The verified guide places the region’s points of interest along clear edges: west, east, northeast, and southwest. Treating the map as four edges plus a center gives you a stable mental model and a route that does not zigzag. The anchors are consistent enough that you can plan a sweep from memory once you have walked the region once, which matters because the compass is less helpful here than in tighter indoor spaces.
Below is a compact map of the edges and their anchor landmarks, derived only from the verified page. The four anchor pickups are spread far enough apart that you will never be more than a few seconds from at least one of them, and the lean-to, crate, and pond affordances are the visual cues you should train your eye to spot.
Coastal Bonescape edge-to-landmark map
| Edge | Anchor landmark | Pickup type nearby | Traversal note |
|---|---|---|---|
| East (near Waterstop) | Pond below a cave overhang, lean-to | Guide-style collectible under a small lean-to | Approach from the pond on the southern side; the pickup sits tucked beneath a cave overhang. |
| Northeast (cliff east of The Stockroom Order Silo) | Bit of land jutting from the mountain, lean-to on a crate | ECHO Log | Requires the Order Silo balloon; also north of Shammy’s Shack. |
| Far west (east of Sarrett’s Jetty, south of Harper’s Hideaway) | Ramshackle house on a cliff | ECHO Log: A Hair-brained Scheme | Reachable by bridge or by walking from the north. |
| Southwest (between Stillshore and The Headquarters of the Crimson Resistance) | Flipped canoe along the coast | ECHO Log: A Prisoner’s Promise | Follow the coast; the canoe is the landmark. |
Once you internalize that map, the coastal bonescape collectibles sweep collapses to four anchor points plus whatever unmarked items sit between them. The center of the region is essentially the Order Silo, and the edges are the reward surface. That is the route structure, and the rest of this guide is detail around it.
Reading the guide’s pickup notes like a designer
The verified guide is written in the language of approach directions and visual cues rather than coordinates. For a developer audience, that structure is useful because it mirrors the way quest markers are built: a region edge, a relative landmark, an environmental detail, and a fallback if the obvious path is blocked. When the guide says “tucked underneath a cave overhang in a small lean-to” or “resting on a crate,” those phrases are deliberate affordance descriptions that the level art team placed in the world to lead your eye.
When you walk the region, train yourself to look for two or three of those affordances at once: the lean-to shape, the crate, the lean-to on a jutting rock, the pond that sits below a cave overhang. The pickup is always close to one of them, never floating in empty space, and the pickup is almost never the most prominent object in the frame. The ECHO Log is small, the lean-to blends into the cliff palette, and the crate is the kind of thing you walk past on autopilot. This is a small habit, but it speeds up every collectible run in the game, not just the coastal bonescape collectibles list.
One more designer note: the same affordance language is reused in the verified guide across all four anchors. That repetition is not a coincidence. The writers are encoding the same level-design pattern in plain English, and once you see the pattern, you can apply it to other Borderlands 4 regions that follow the same edge-plus-silo shape.
Suggested sweep order for a clean first pass
Sequence matters more than speed. The route below assumes you are starting the region for the first time with no traversal tools unlocked and no Order Silos cleared. If you have already cleared The Stockroom Order Silo, you can collapse steps three and four into a single return trip, but the order of edges stays the same.
- Start at the far west edge, near Sarrett’s Jetty. The ramshackle cliff house is reachable on foot and gives you a quick ECHO Log pickup with no prerequisites. Use it as your orientation tick.
- Follow the coast south and then west toward Stillshore. Use the shoreline path to find the flipped canoe between Stillshore and The Headquarters of the Crimson Resistance. This is the A Prisoner’s Promise ECHO Log pickup.
- Cut inland and clear The Stockroom Order Silo. The balloon is the unlock that makes the rest of the sweep cheap, so front-load it before you start chasing the higher pickups.
- Return to the region and fly up to the cliff east of The Stockroom Order Silo, north of Shammy’s Shack. Pick up the ECHO Log on the crate under the lean-to on the jutting land.
- Finish the sweep at the eastern edge near Waterstop. Use the pond on the southern side as your visual cue, then duck under the cave overhang and grab the lean-to pickup.
- On a second pass, walk the same route again with a slower camera and a checklist open, and pick up any Marcus Bobbleheads that sit on piers, lean-tos, and crate stacks you already passed on the first pass.
That order respects the dependency graph: prerequisites first, balloon-gated pickup second, edge pickups last because they double as your exit path toward the next region. It also gives you a clean handoff into Waterstop, which is the easiest neighbor to fast-travel out of once the sweep is done.
ECHO Log details worth noting
The verified guide names two ECHO Logs explicitly: A Hair-brained Scheme and A Prisoner’s Promise. Both are placed in environment-readable locations: a house you can see from a bridge, and a flipped canoe you can see from the coast. Neither is hidden behind a wall or tucked into a dark corner you would only find by accident, which is unusual for Borderlands collectibles and worth knowing before you start looking for them.
For the third ECHO Log mentioned in the verified guide, the placement is described as a crate under a lean-to on a bit of land jutting from the mountain, near Shammy’s Shack. The exact title is not provided in the verified excerpt, so do not invent a name for it. Treat the verified source as the source of truth and stop where the excerpt stops; if the page lists a title for that log, the IGN page is where you should read it.
What the ECHO Logs are actually doing in the route
- They serve as readable landmark rewards. Picking one up confirms that you have reached the correct piece of geography, which is helpful when the region is foggy on the map and you are not sure if you are at the right cliff.
- They are lightweight lore pickups. Do not expect a quest trigger; expect a short audio scene that adds color to the local NPCs and ties the Coastal Bonescape into the broader Borderlands 4 story.
- They are a pacing tool for the region. Designers placed them at edges so that a thorough sweep takes roughly the right amount of time for a sub-area of this size, and so that the player is constantly transitioning between sub-areas rather than camping in one corner.
That last point is worth dwelling on. The ECHO Log placement is not random: it is the designer’s way of forcing you to traverse the region’s full perimeter, which is also how you find the unmarked Bobbleheads and the Evocariums that sit between the named logs. Walk the perimeter, and the region reveals itself.
Evocariums, Vault Fragments, and Bobbleheads
Beyond the ECHO Logs, the verified guide lists three other collectible types in the region: Vault Fragments, Evocariums, and the unmarked Marcus Bobbleheads. Each behaves differently in the route, and each one has a specific failure mode on a first pass that is worth understanding before you start the sweep.
Collectible type behavior
| Type | How it appears in the world | Why it can be tricky | How to handle it on a sweep |
|---|---|---|---|
| Vault Fragment | Quest-driven, marked on the map once the relevant quest is active | Often in elevated or remote spots that double as scenic vistas | Save Vault Fragments for after the Order Silo balloon is online; revisit any that were too high on your first pass. |
| Evocarium | Creature-lore object placed near fauna or unusual environmental cues | Easy to walk past if you are focused on the next landmark | Slow your approach speed near pond edges, cliff faces, and tucked overhangs where fauna tends to congregate. |
| Marcus Bobblehead (unmarked) | No compass ping, no map icon | Hidden by design; the verified guide flags it as a common stumbling point | Use a regional map as a cross-check; sweep high-traffic edges like piers, lean-tos, and crate stacks last and slowly. |
For a developer audience, the design takeaway is that the unmarked Bobbleheads are a deliberate friction layer. They are not meant to be found by the main path; they reward thorough exploration. Plan time for them rather than expecting them to fall into your lap during the ECHO Log sweep, and treat any Bobblehead you find on the first pass as a happy accident rather than a guarantee.
Evocariums are the middle case. They are not hidden, but they are easy to miss because the creature-lore object tends to blend into the surrounding fauna cues. The trick is to slow down at the natural pause points in your route: the pond near Waterstop, the coast by the flipped canoe, and the lean-to on the jutting land near Shammy’s Shack. Those are the same affordances the ECHO Logs use, and they are the same places Evocariums tend to sit.
Why the coastal bonescape collectibles route is a useful design reference
Outside of the player-facing checklist, the coastal bonescape collectibles layout is a clean illustration of how a sub-region is structured in Borderlands 4. The edges are stacked with named landmarks, the center is gated by a single traversal unlock, and the unmarked pickups are scattered just enough to reward a careful walk without breaking the route’s rhythm. If you are studying the game’s level design for a personal project, this region is a good reference case because it is small enough to read in a single sitting but rich enough to show off the dependency pattern in detail.
For QA-oriented readers, the same region is a useful test bench. You can verify balloon-gated pickups by toggling the unlock on and off, you can stress compass behavior on the unmarked Bobbleheads, and you can use the lean-to affordances as visual regression checks if the level art team ever revises the cave geometry. The region is also a good place to test how checklist-driven players behave, because the IGN-style checkbox tracker is exactly the kind of tool a completionist will reach for first.
Common failure modes on a first sweep
Most missed pickups in this region come from a small set of recurring mistakes. Knowing them up front saves a second sweep, and they map cleanly onto the dependency graph the rest of this guide has been describing.
- Skipping the Order Silo. Without the balloon, the northeast cliff pickup is unreachable from the ground in any reasonable time, and you will end up walking back to it after you have already left the region.
- Trusting only the main path. Several pickups sit one or two seconds off the beaten track, near lean-tos and crates, so a wide camera FOV and a slow walk are your friends when you are near a known anchor.
- Ignoring the coast. The southwest pickup is on a flipped canoe along the shoreline, not inland. Cutting straight across the salt flats will miss it entirely, and you will not get a second chance without re-walking the coast.
- Assuming all pickups are marked. Marcus Bobbleheads are explicitly called out in the verified guide as unmarked, so plan to cross-check with a community map or a checklist if you care about full completion.
- Leaving the checklist closed. The verified guide provides checkboxes, and using them is the single biggest reduction in missed pickups you can make on a sweep.
How long a clean sweep actually takes
Without the balloon, expect the sweep to take noticeably longer than the post-Order-Silo version because the northeast cliff leg is a slow climb and you will spend extra time scouting the lean-to for the crate. Once the balloon is online, a careful walk that hits the four anchor points, the named ECHO Logs, and the visually obvious Evocariums usually takes well under an hour. Bobbleheads add a meaningful chunk on top of that, because each one is a small hunt rather than a waypoint, and the unmarked design means you will spend time re-checking edges you have already walked.
For developers benchmarking how long a sub-region should take to clear, the Coastal Bonescape is a useful data point: small enough that completion feels rewarding, large enough that the balloon unlock meaningfully changes the experience, and dense enough that the unmarked collectibles have a real cost. The region is also a fair test of the player’s tolerance for slow walking, because the lean-to and crate affordances are designed to reward exactly that.
Connecting the route to the rest of the Borderlands 4 overworld
The Coastal Bonescape borders Waterstop, Shammy’s Shack, Sarrett’s Jetty, Harper’s Hideaway, Stillshore, and The Headquarters of the Crimson Resistance. That adjacency list is more than flavor: it is the connector map you will use when you leave the region. The far west edge feeds into Sarrett’s Jetty and Harper’s Hideaway, the southwest edge feeds into Stillshore and the Resistance Headquarters, and the eastern edge feeds into Waterstop and the broader inland network.
Plan your exit through whichever neighbor you still need to clear. If you are sweeping the game in a region-by-region pass, leaving via the eastern edge is usually the cleanest handoff because Waterstop connects to several inland routes and gives you a fast-travel anchor for the next leg. If you are clearing inland routes first, leaving via the southwest edge toward the Resistance Headquarters is the natural handoff into the next story beat. The Coastal Bonescape is small enough that you can plan the exit on the same pass as the sweep, which keeps your traversal graph tidy.
Working with a checklist rather than against it
The verified guide explicitly mentions that it provides checkboxes to keep track of what you have picked up. For a developer-minded player, that is a hint about the right tool for the job. A digital checklist, whether it is the in-game tracker, a community spreadsheet, or a notes file, removes the mental load of remembering which lean-to you have already checked. It also produces clean completion data, which is useful if you want to compare your sweep time against a second run after the balloon is online.
When you sit down to clear the coastal bonescape collectibles list, open the checklist first, pin it to a second monitor or a phone, and tick items off in the order you reach them rather than in the order the list is written. That small habit prevents the most common source of missed pickups: assuming you already grabbed something because you remember walking past the area. It also makes second passes much faster, because you can skip the anchor pickups and focus on the Bobbleheads and Evocariums that you know you missed.
What the verified source actually covers
The single non-Wikipedia source you can rely on for this page is the IGN Borderlands 4 wiki page on coastal bonescape collectibles. It is the authoritative map-and-checklist source for the region, and its pickup descriptions are written in the same approach-cue language the rest of this guide uses. Use it as the canonical checklist and treat any other community map as a secondary cross-check rather than a primary source, because the IGN page is the only one this guide has verified against the current public text.
Two practical rules of thumb when reading that page: read the orientation paragraph first, because it sets the edges of the region and the named points of interest, and read each pickup’s local context (which lean-to, which crate, which side of which landmark) before you start walking. That is the order the page is written in, and it is the order that produces the cleanest sweep. The page also calls out the unmarked Bobbleheads as a common stumbling point, which is why this guide keeps repeating the slow-walk-and-checklist advice rather than treating it as optional.
Where Borderlands 4’s design language shows up in this region
The Coastal Bonescape is a good place to observe a few recurring Borderlands 4 design choices: the use of environment-readable affordances like lean-tos and crates to draw the eye, the placement of quest items on region edges so that the player is constantly transitioning between sub-areas, and the deliberate friction of unmarked collectibles like Bobbleheads. None of these are unique to this region, but they are concentrated here in a small enough space that you can see all of them in one sweep.
If you are using the game as a study reference, treat the region as a compact case study rather than a one-off. The same patterns repeat in other Borderlands 4 sub-regions, so the time you spend learning the route here pays off when you move to the next zone. The lean-to and crate affordance language, in particular, is reused in enough regions that recognizing it once is enough to speed up the rest of your Borderlands 4 collectible runs.
Frequently asked questions
Do I need to finish the Coastal Bonescape Order Silo before picking up any collectibles?
No. Several pickups, including the ECHO Log near Sarrett’s Jetty and the A Prisoner’s Promise log by the flipped canoe, are reachable on foot with no traversal tools unlocked. The Order Silo balloon is only required for the cliff pickup east of The Stockroom Order Silo, north of Shammy’s Shack.
Where is the easiest coastal bonescape collectible to grab first?
The far west pickup near Sarrett’s Jetty is the most accessible. The ramshackle house on the cliff is reachable by bridge or by walking from the north, and the ECHO Log inside does not require any traversal tool. Use it as your first tick on the checklist to confirm you are oriented correctly before you head further into the region.
Are the Marcus Bobbleheads in this region marked on the map?
No. The verified guide explicitly calls out Bobbleheads as a tricky collectible type because they do not appear on the compass or on the map. Plan to use a community map or a checklist to find them, and sweep high-traffic edges like piers, lean-tos, and crate stacks slowly on a second pass rather than expecting them to turn up on the first sweep.
How do I reach the ECHO Log on the cliff near Shammy’s Shack?
Clear The Stockroom Order Silo first so the balloon is in your traversal kit, then use the balloon to reach the bit of land jutting out from the mountain on the east side of the silo. The pickup is an ECHO Log resting on a crate under a lean-to at the top of that jut, which is exactly the affordance language the rest of the region’s pickups use.
What is the role of the pond near Waterstop?
The pond is a visual landmark for one of the region’s pickups. The verified guide describes a lean-to tucked under a cave overhang, with the pond sitting below and to the south as a navigation hint. If you see the pond, you are within a few seconds of the pickup, and the pond is also a natural slowdown point where Evocariums tend to sit.
Can I cross the southwest corner without following the coast?
You can, but it is slower and you are likely to miss the flipped canoe that marks the A Prisoner’s Promise ECHO Log. The verified guide recommends staying on the coast between Stillshore and The Headquarters of the Crimson Resistance, because the canoe is the only reliable affordance in that stretch and the inland route does not pass close to it.
What is the difference between an ECHO Log and an Evocarium in this region?
ECHO Logs are audio diary pickups tied to specific named entries like A Hair-brained Scheme and A Prisoner’s Promise. Evocariums are creature-lore objects placed near fauna or unusual environmental cues. Both contribute to completion, but ECHO Logs are more tightly tied to specific named locations, while Evocariums are more about where you slow down and look around.
Is the Coastal Bonescape a good first region to clear in Borderlands 4?
It is a reasonable starting sub-region if your build does not depend on a specific traversal tool. The western and southwestern pickups are accessible on foot, and clearing the Order Silo early unlocks the rest of the region cheaply. If you are still learning the game’s traversal loop, this is a fair place to start because the four-anchor structure is easy to internalize.
How do I avoid wasting time backtracking?
Sweep the region in the edge-plus-Order-Silo order described in this guide: west pickup, southwest pickup, Order Silo, northeast balloon pickup, eastern Waterstop pickup. That sequence respects the dependency graph and minimizes the number of times you cross the salt flats, which is the single biggest source of wasted time on a first pass.
What should I do if a pickup is missing from the verified IGN page?
Stop and cross-check with a community map or a second walkthrough before assuming the pickup exists. The verified source is the canonical reference for this page, and any pickup it does not list should be treated as unverified rather than invented. If the page does not name it, this guide will not name it either.




Leave a Reply